


There are countless step-by-step guides online that go over how to setup a planted tank. But for someone new to the hobby, that information can be pretty overwhelming at first. To be honest, I got back into the hobby after an 11-year hiatus (store for another time). While cleaning the house, we came across several old Aqua Design Amano (ADA) Aqua Journals, along with photos from my International Aquatic Plants Layout Contest (IAPLC) entry. It was a reminder of why planted tanks drew me in to begin with—and how approachable planted aquariums can be with the right guidance.
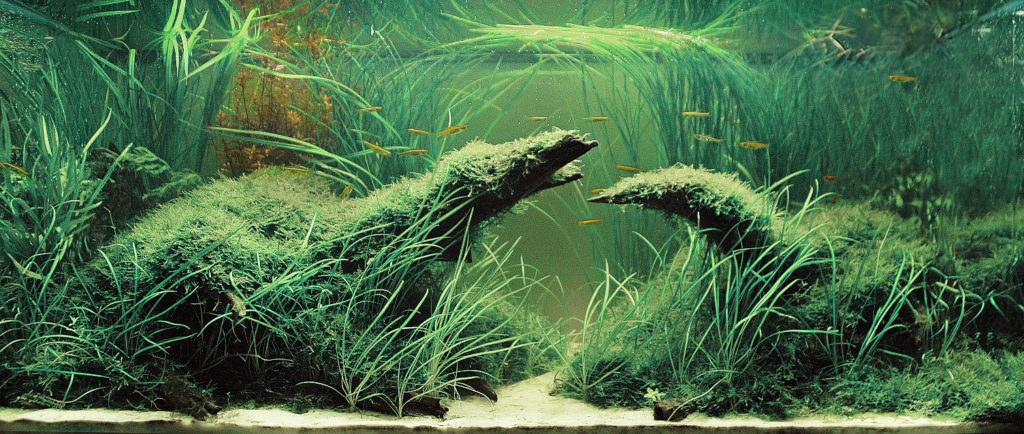
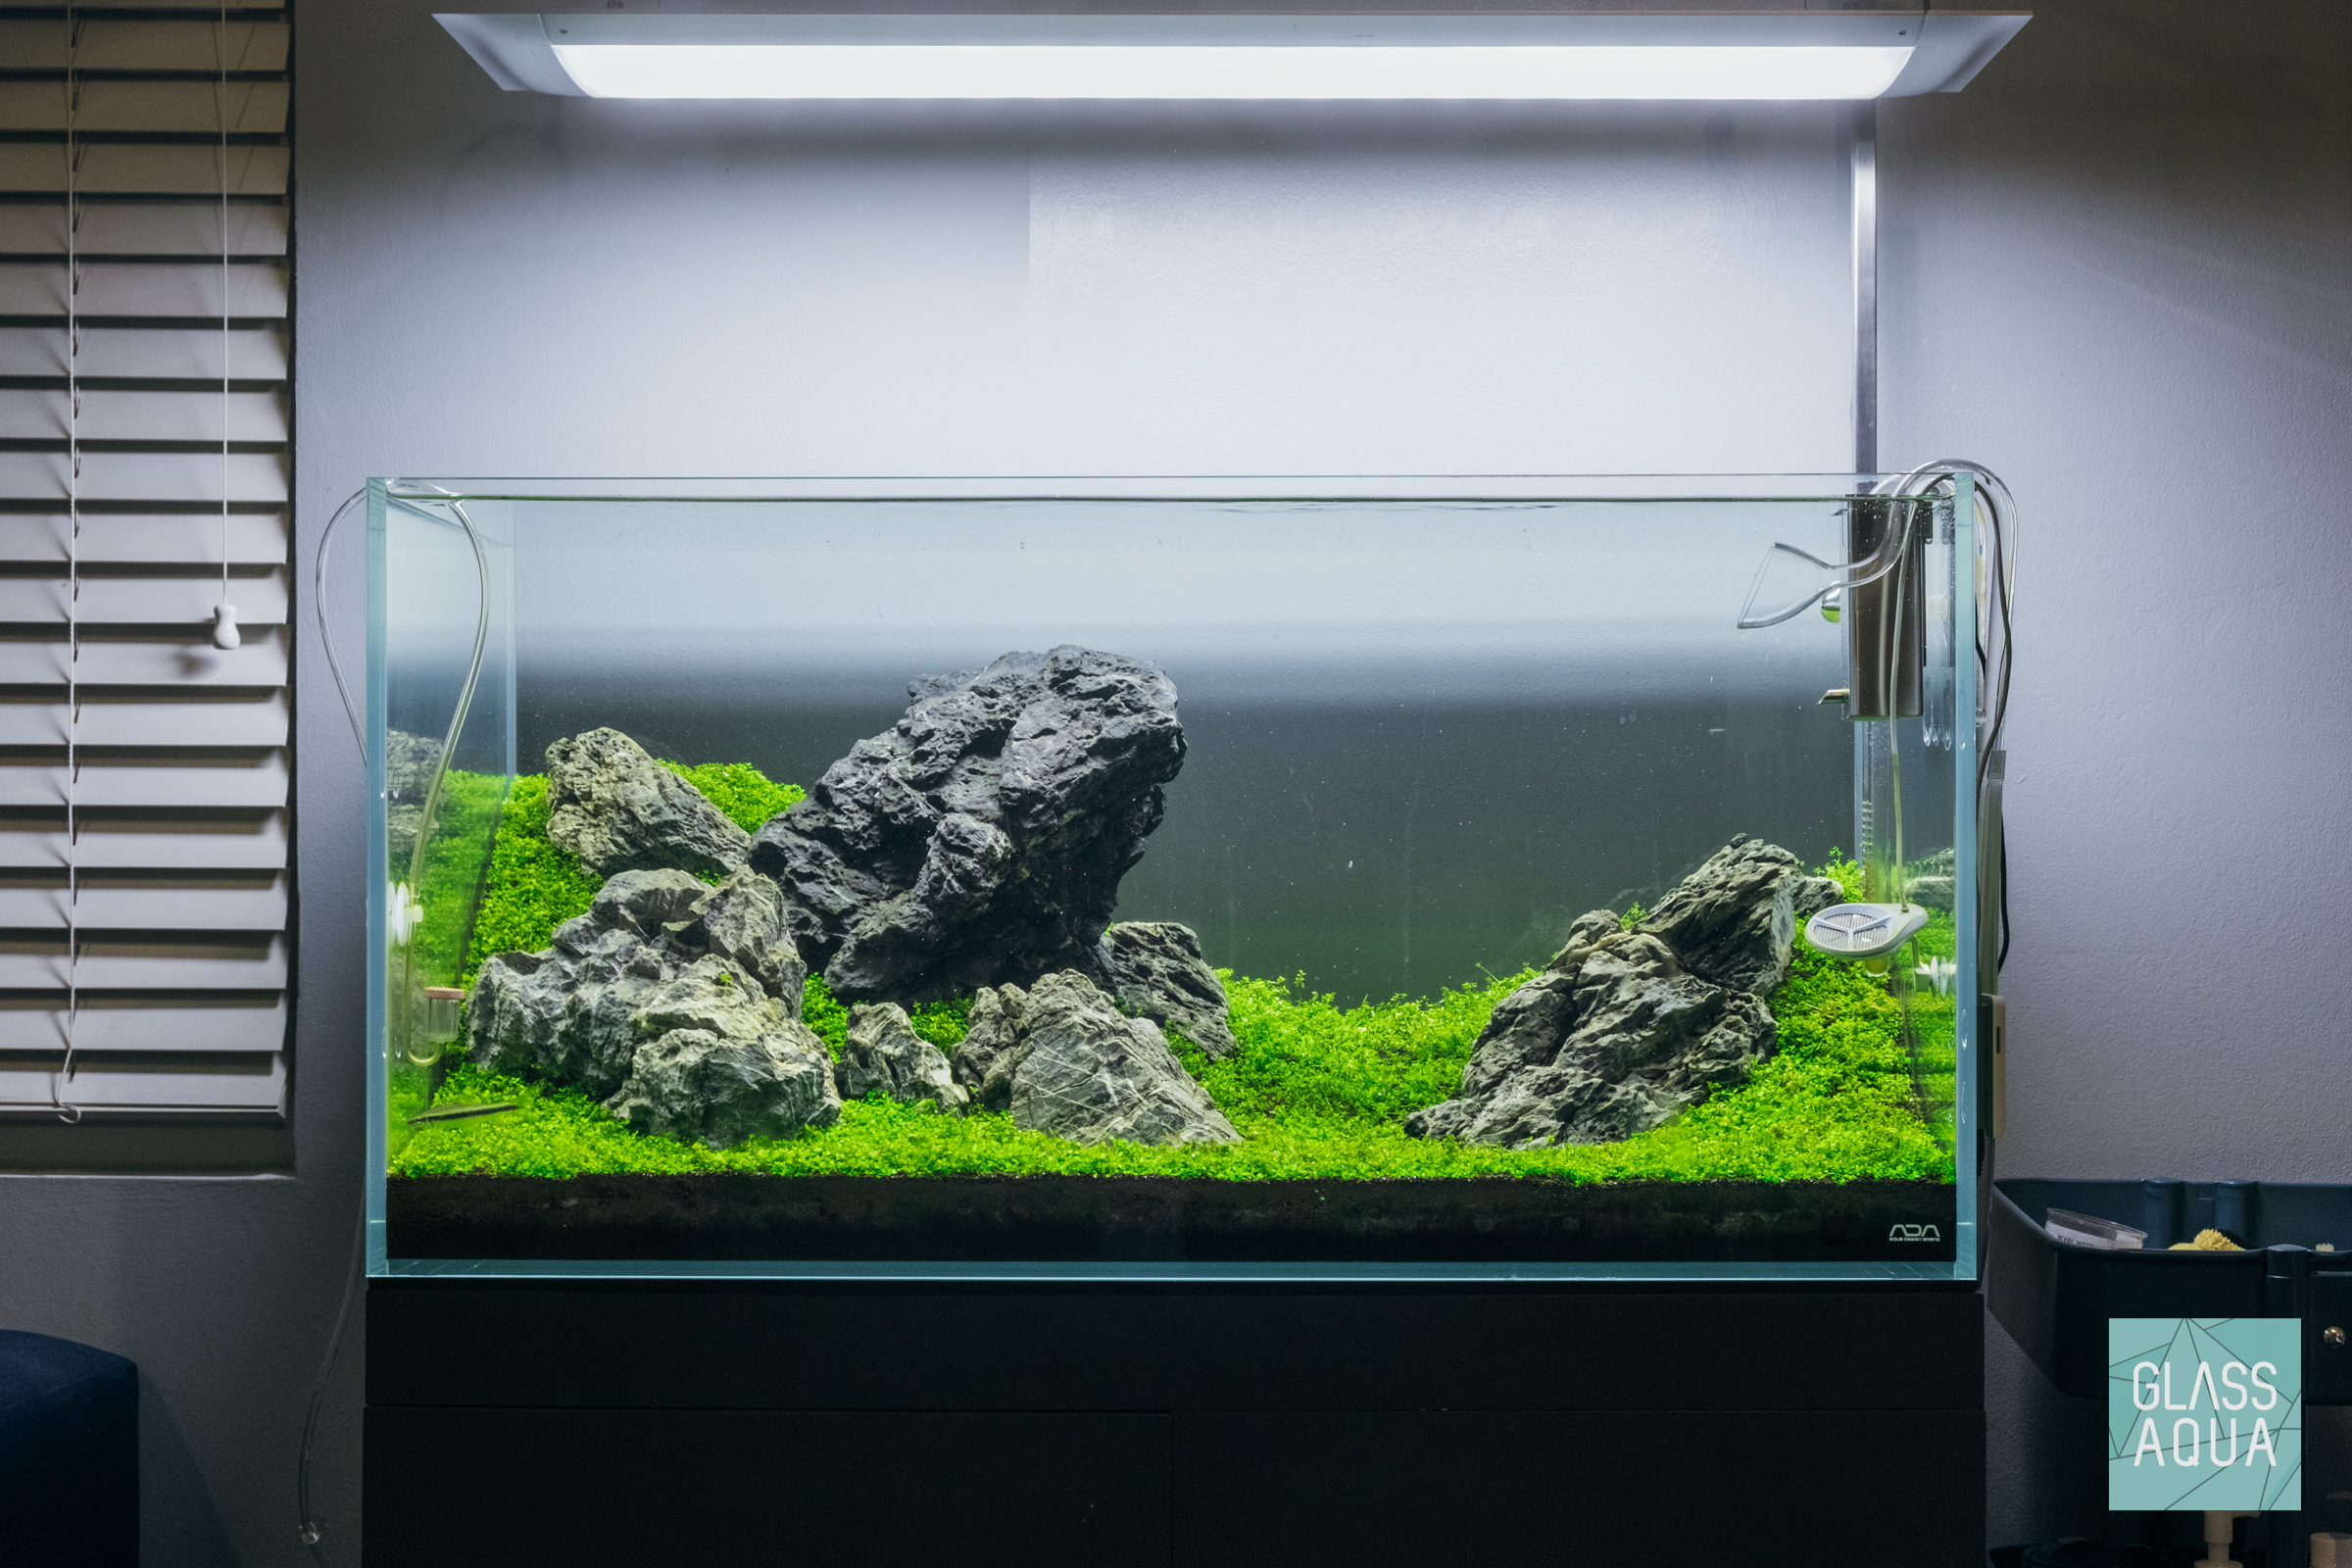
With encouragement, we took a trip to our local fish store and came back with a complete 48-gallon tank setup. In just a few short months, our space was filled with aquariums. Nearly every room had at least one planted tank (the bathroom being an exception). It’s hard to fathom how much time was poured into each one, but it’s safe to say we dove back into the hobby full swing. What surprised me most was how much had changed in the few years I’d been away. I took the time to relearn nearly every aspect from the ground up. After six months and a handful of successful aquascapes, I feel confident enough to share our planted tank setup guide. In this article, we’ll be using our Ultum Nature Systems high-tech nano planted aquarium as the example.
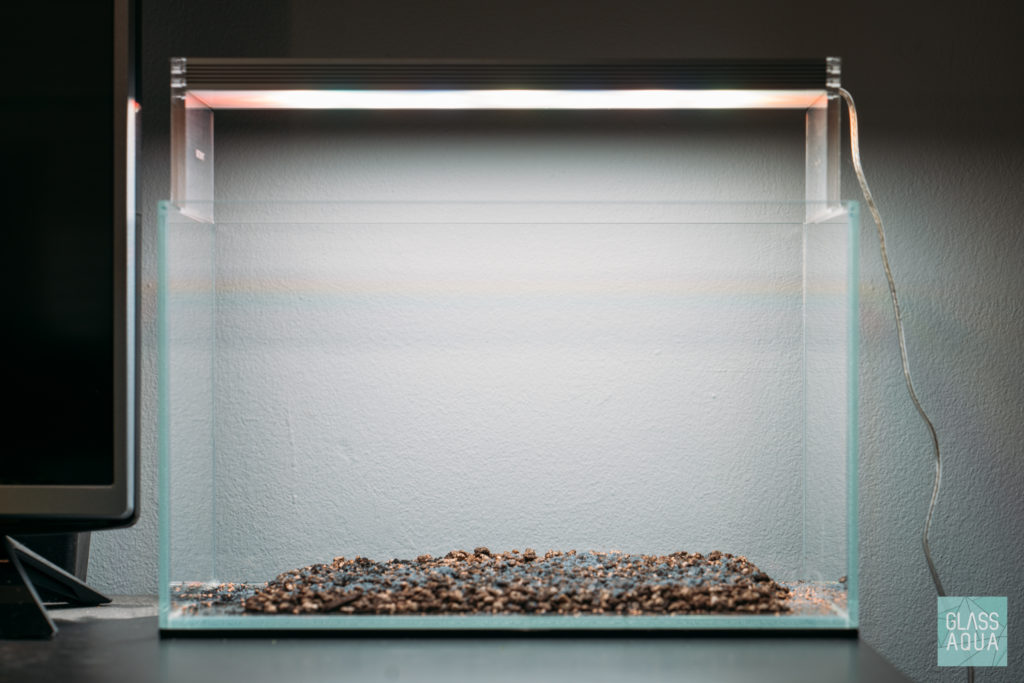
The first layer of substrate additives are usually ignored because they’re optional depending on your aquatic plant choice and main substrate you use. Companies like Tropica, Fluval, Seachem, Aquario and UNS offer aqua soils and substrates that are all-inclusive and packed with essential plant nutrients. However, we’ve had the most success in our tanks with the ADA system so we’ve stuck to it. It’s a higher price to pay, but aquatic plants love it. In this example, we added about a 1/4 bag of ADA Power Sand Special Small, ADA Bacter 100, ADA Tourmaline BC and ADA Clear Super. The Power Sand will allow the aquatic stem plants that we chose for this nano tank to thrive and grow solid root systems. Aquarium plant supplements support long term water column balance which is important for aquarium plant and livestock health.

Next, we added two layers of ADA Aqua Soil Amazonia Light on top of the Power Sand and additives. We start with normal sized granules then pour fine-type aquarium soil on top. Smaller granules look great in nano aquariums and provide better scale and we simply prefer it for overall aesthetics. Planted nano tanks are usually viewed up-close and personal, so every detail is magnified, including the size of the tank. The goal behind most planted nano tanks is making the aquascape look larger than the tank it’s actually in. This can be done through strategic choice of aquarium plants, hardscape, and even the substrate itself.
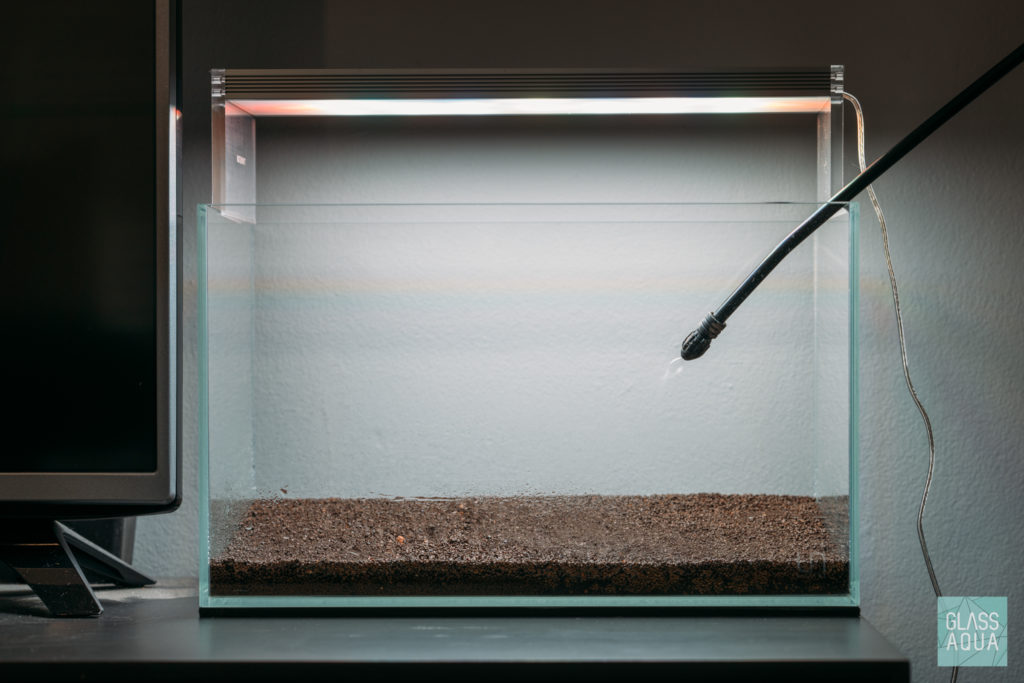
We thoroughly soak the ADA substrate. By wetting the aquarium soil with a fine mister, the substrate layer isn’t disturbed, stays level and is easier to plant in. We avoid filling the tank during this step because scaping and planting in a flooded tank is extremely difficult since aquatic plants like to float.
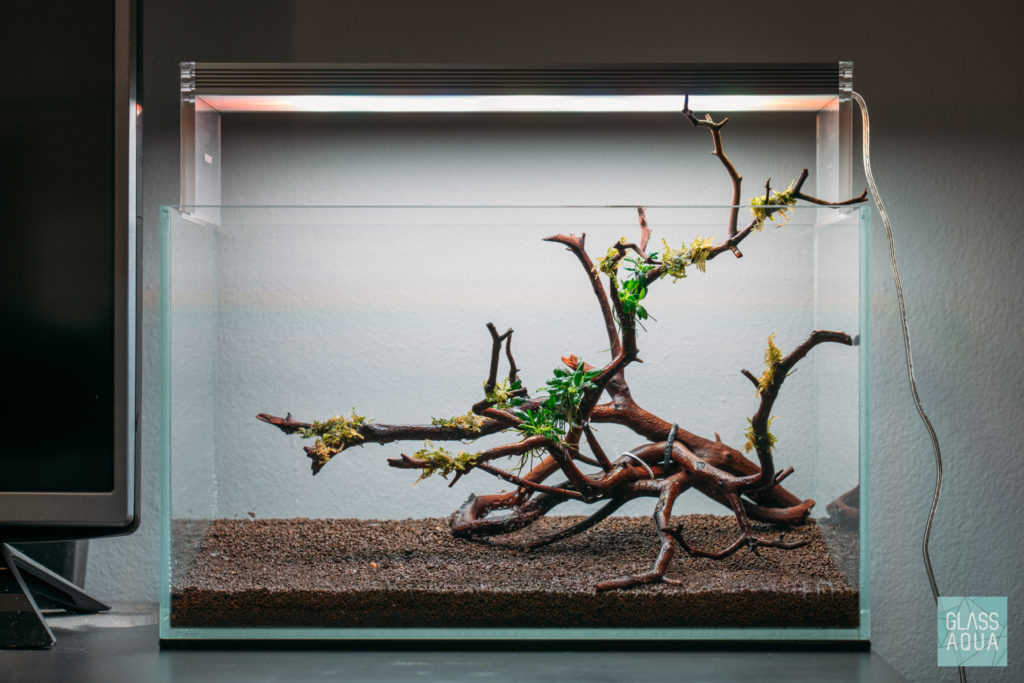
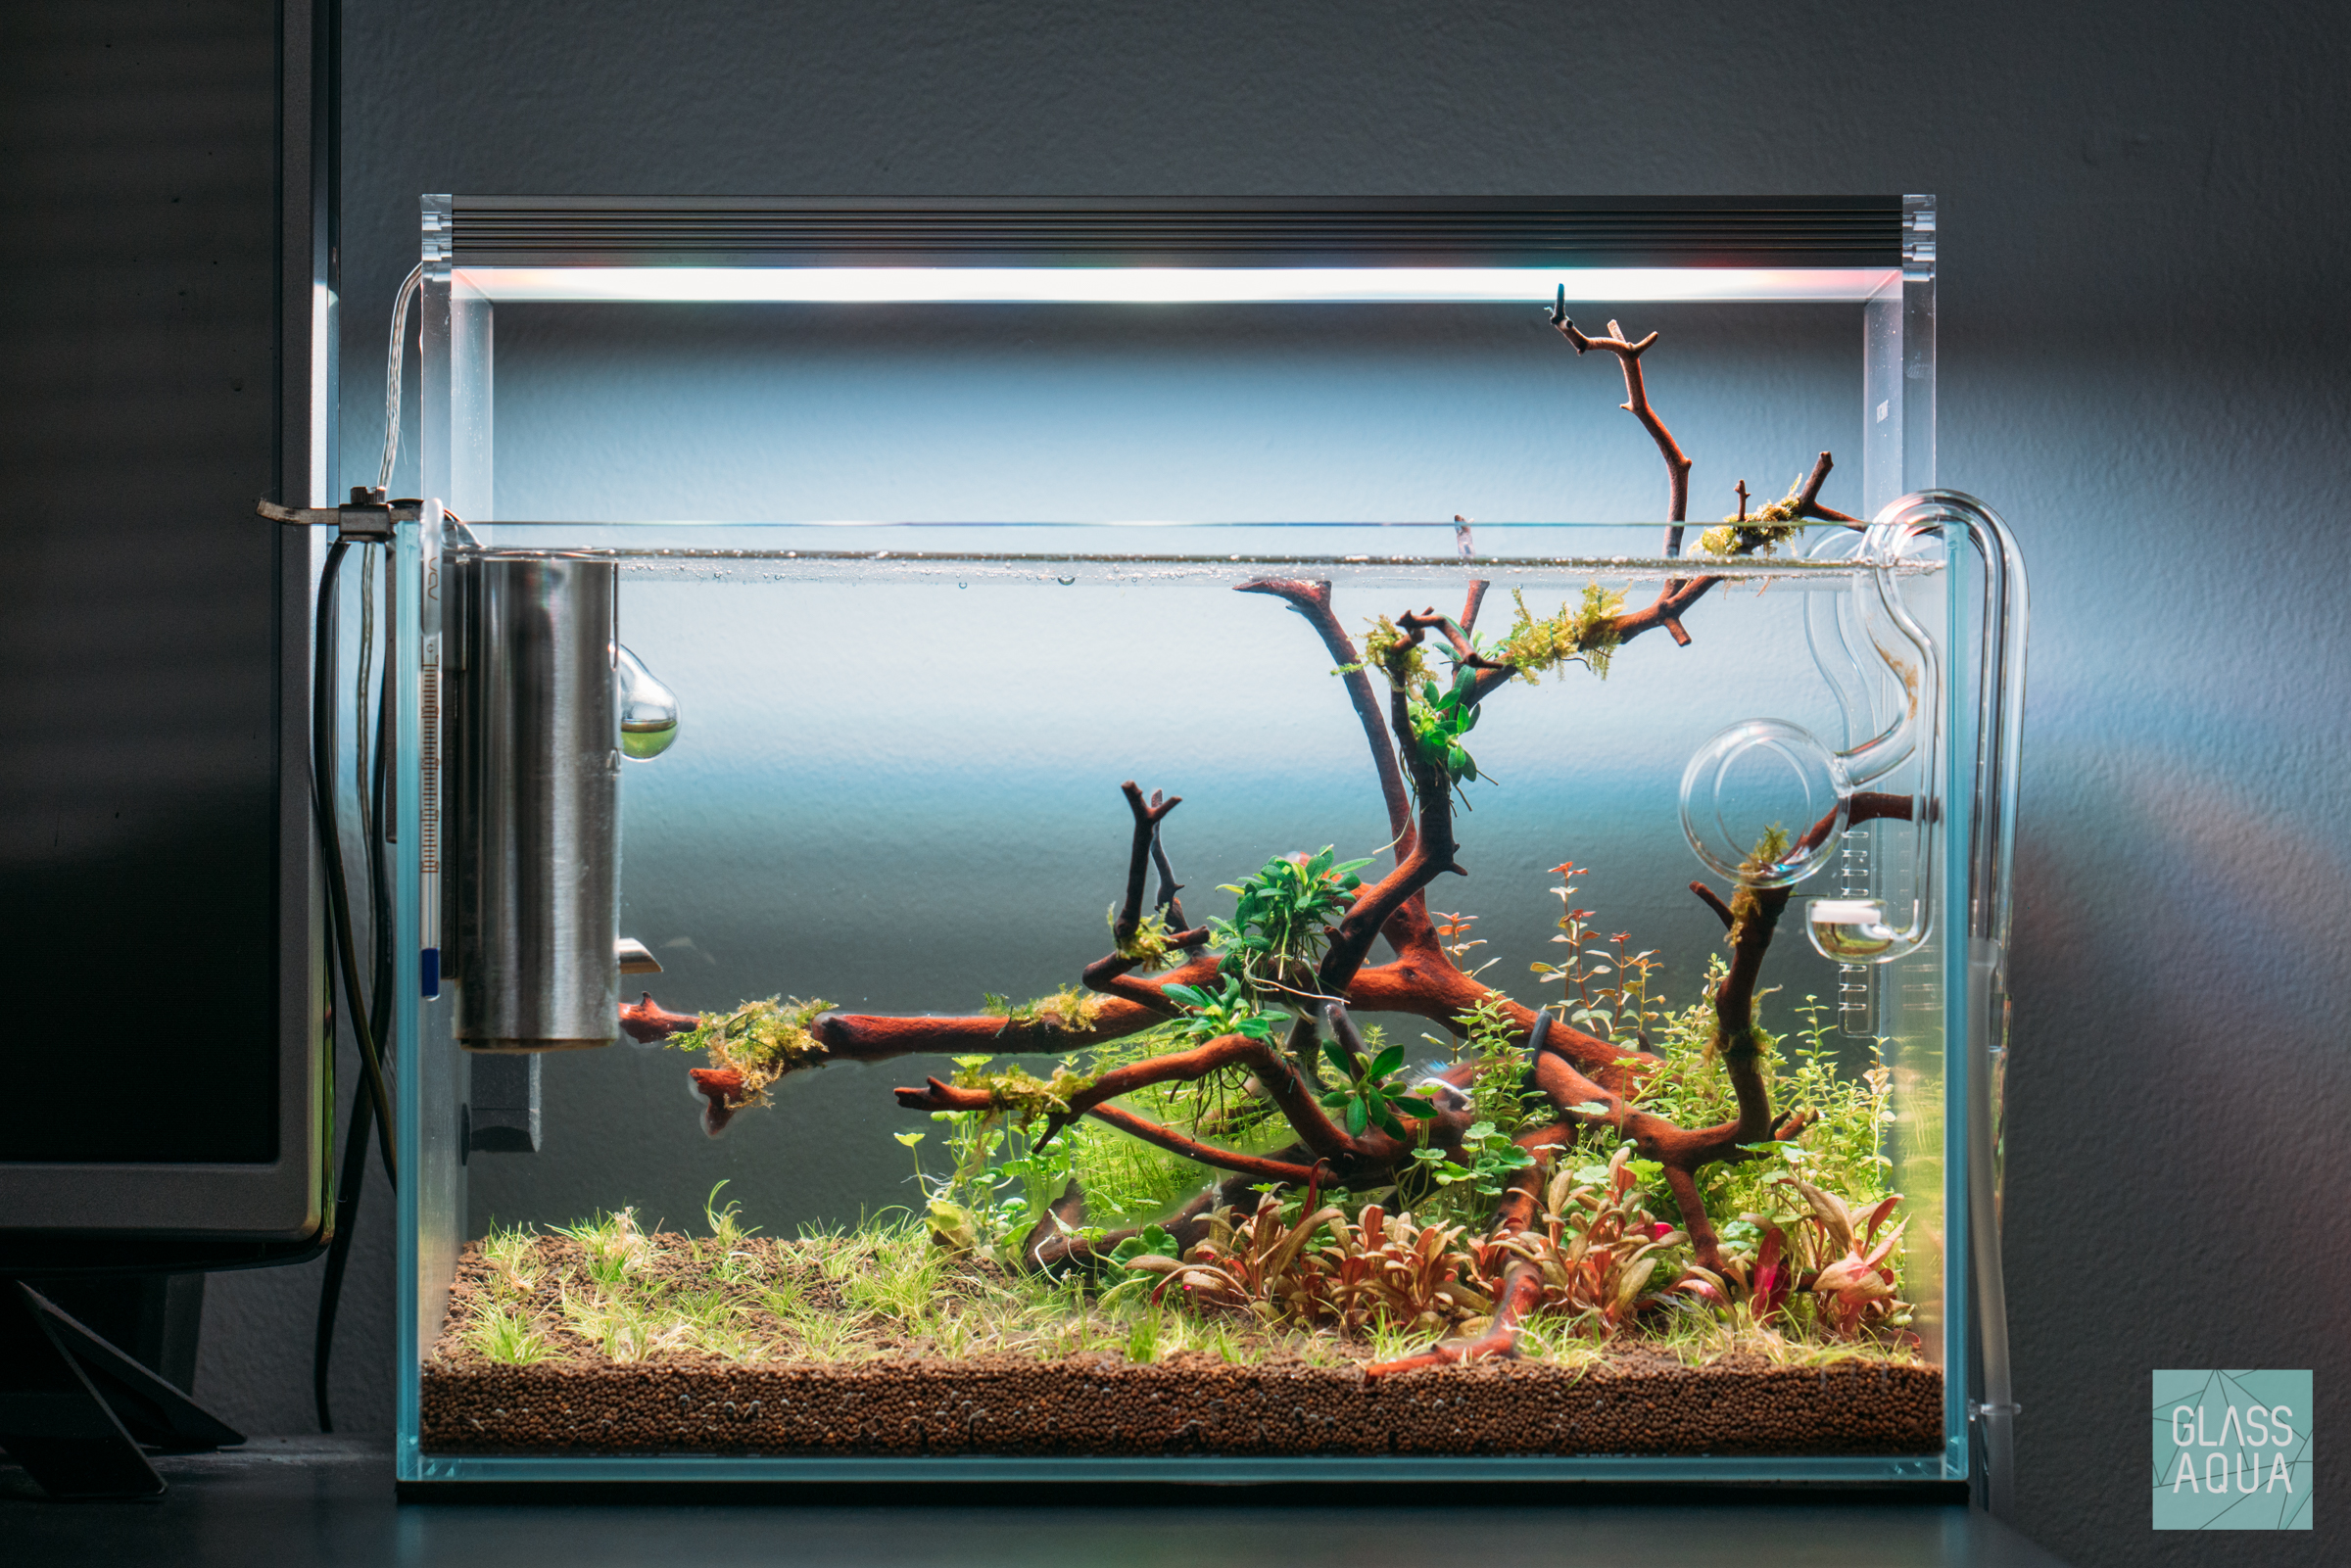
After the substrate is moderately wet and ready for planting, we position our choice of hardscape, (in this case, Manzanita Wood) into the rimless tank. We’ve pre-boiled and soaked these wood twigs. Doing this in advance ensures the wood won’t float and helps release tannins, reducing the tea-colored tint that would appear otherwise. Attaching aquatic plants such as aquarium moss and aquatic rhizome plants is easier too! From our experience, all types of driftwoods for aquariums will float because they are dried prior to sale. Make sure to soak your driftwood before aquascaping. Floating wood after filling a complete scape is a terrible feeling.
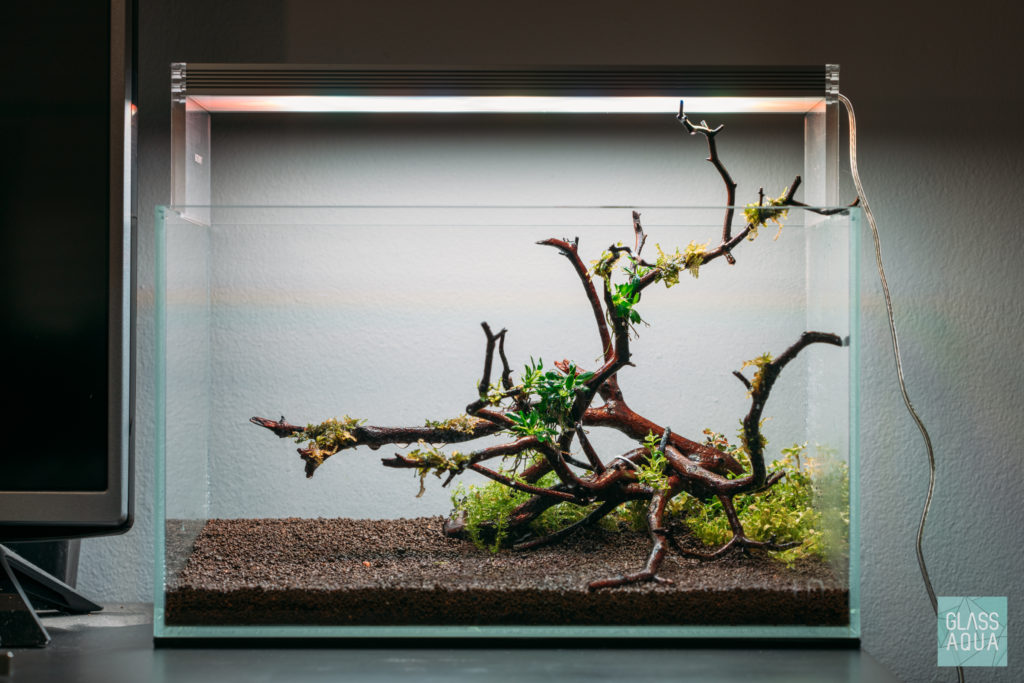
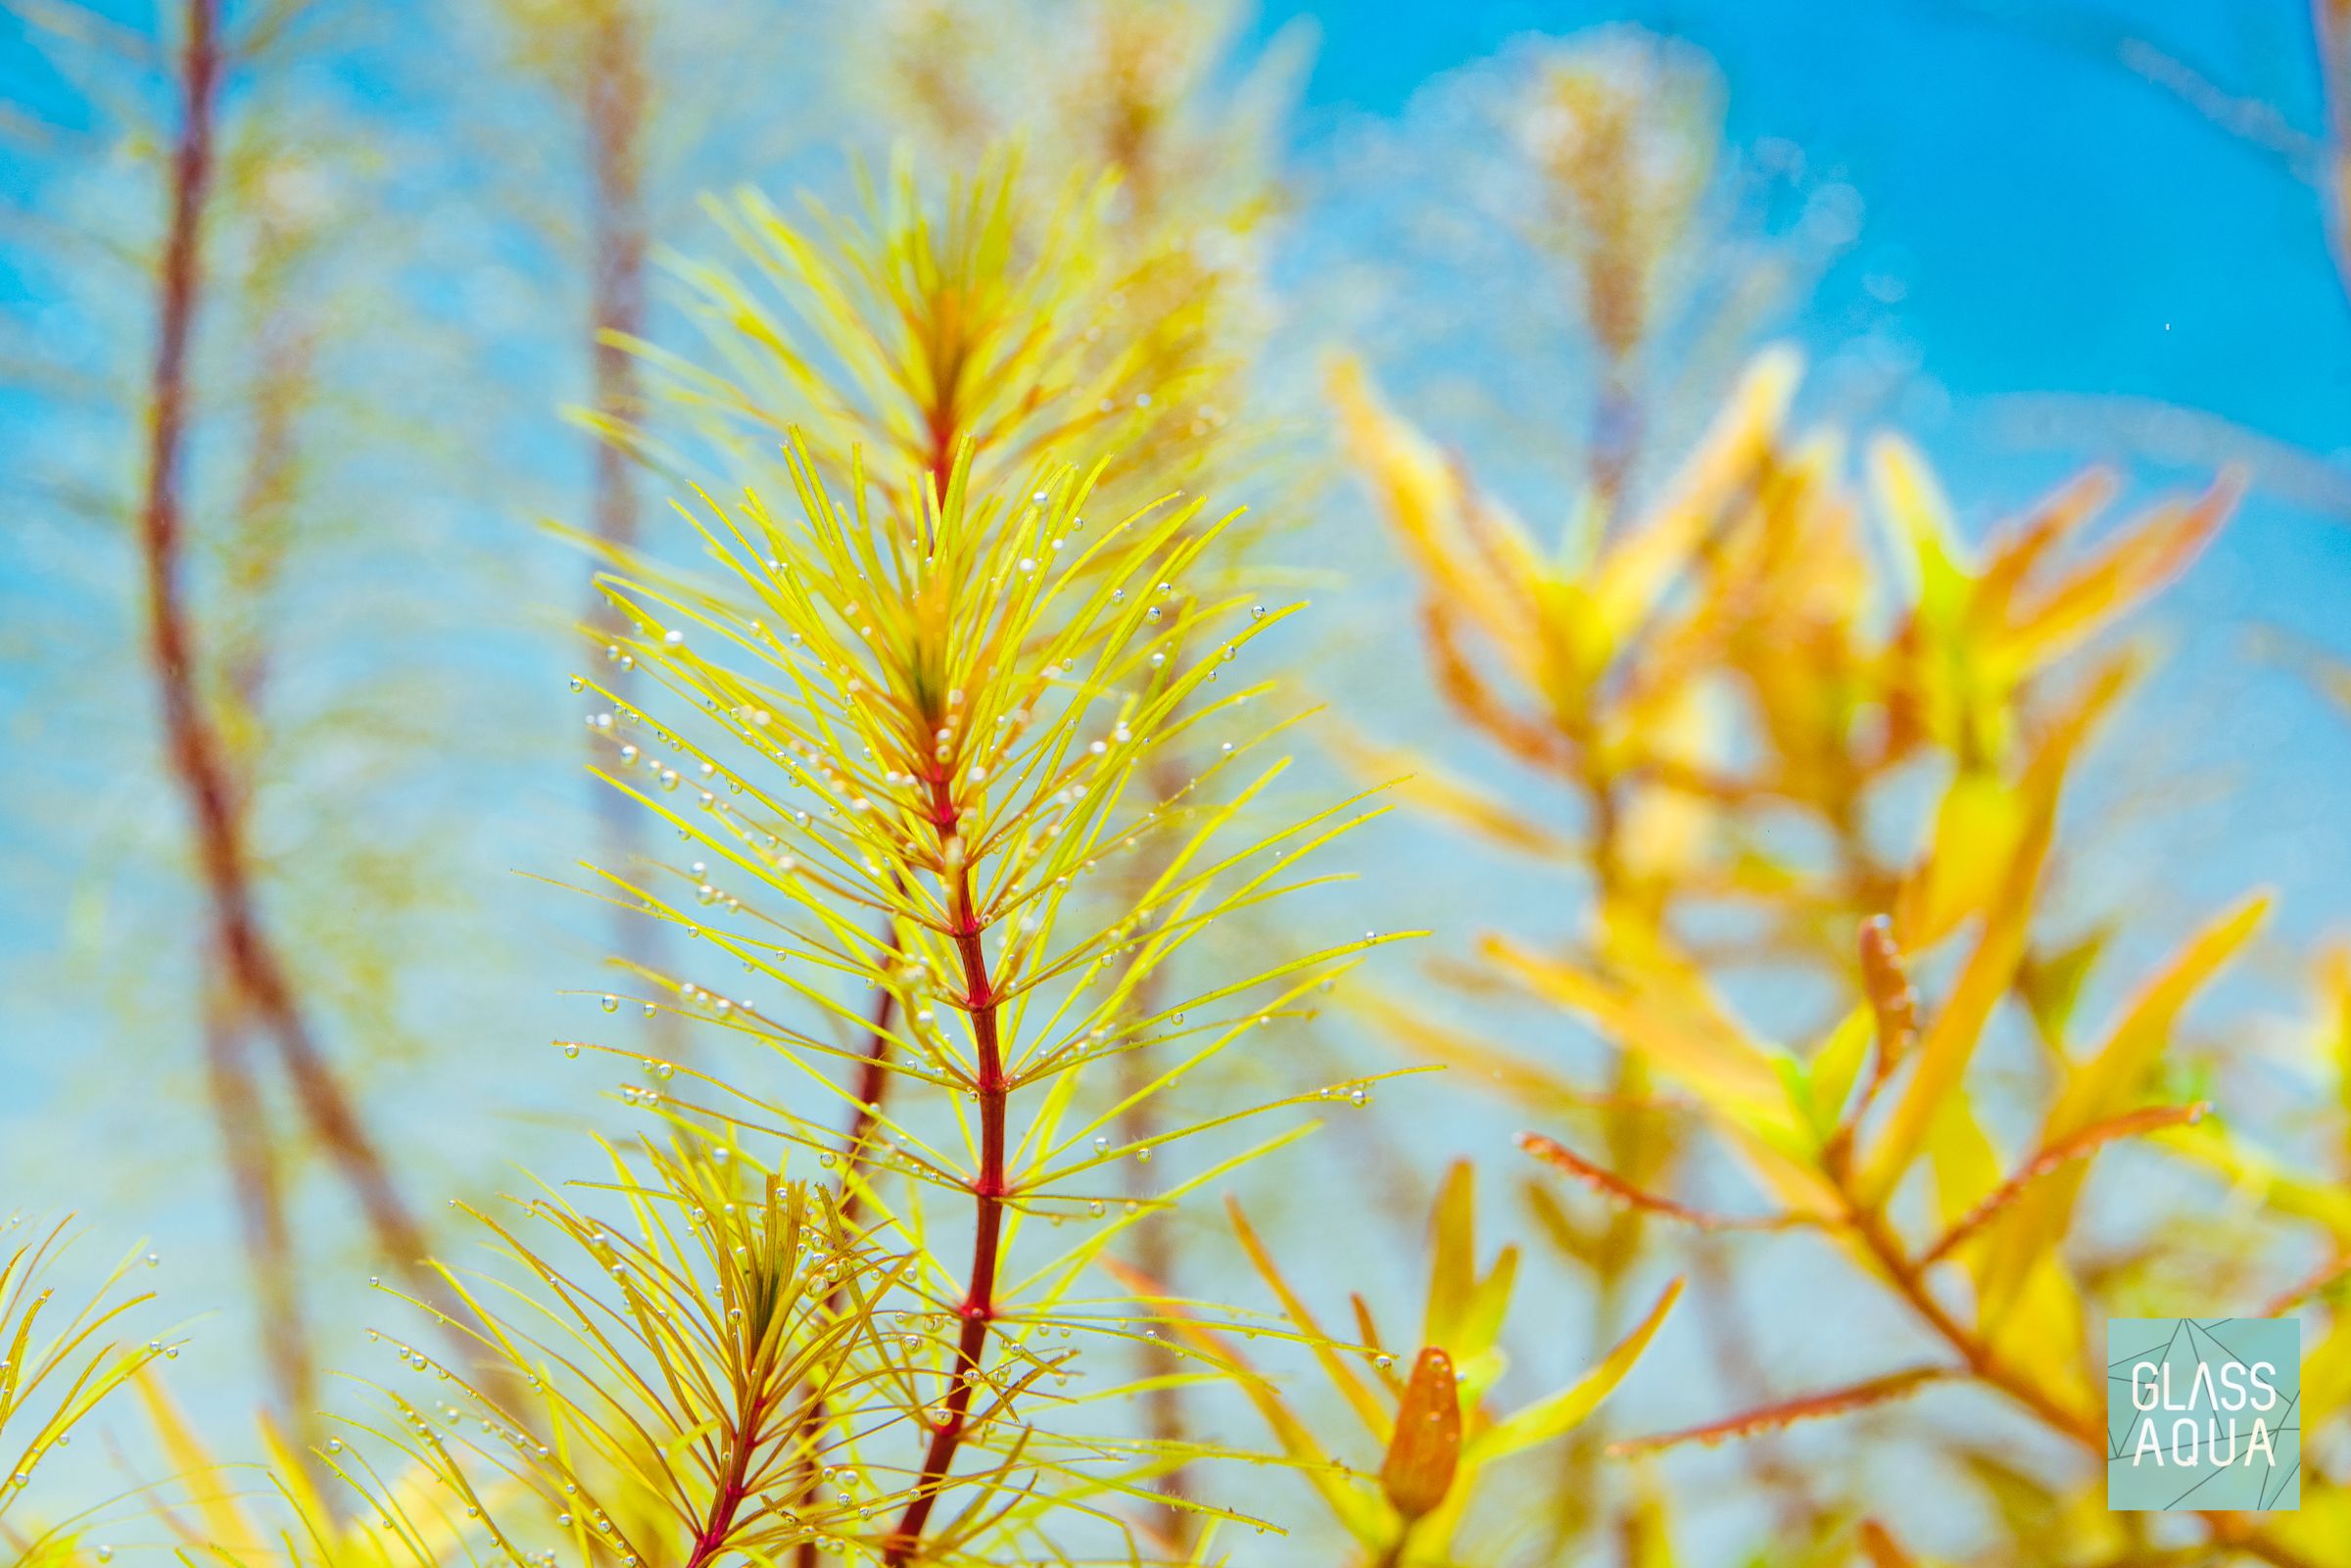
The real fun begins when you get to plant your first plant into the substrate. Planting from background to foreground will allow you to visualize where each aquatic plant species will go. Our general rule is to cater the hardscape to plants of choice. In this example, we really wanted to feature a main red stem plant and compliment the Manzanita Wood along its base. Different species of stem plants in various greens, pinks and red were planted first.

Once the background was filled in, we moved on to the midground. This is often the most challenging part of a planted tank, since midground plants come in a wide range of sizes and growth habits. Our best advice is to choose plants that are proportionate to your tank. A single plant taking over the entire tank on its own will throw off the balance of your aquascape.
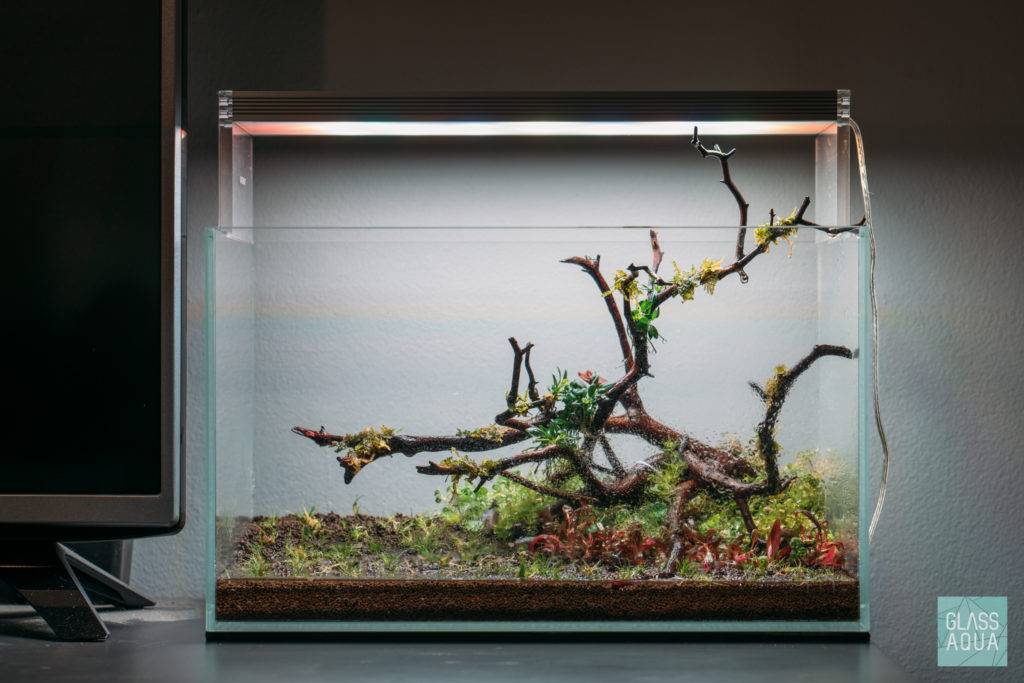
Now you’re one step closer to filling the tank. All that’s left is the foreground. We ended up planting hair grass for a softer feathery look. The great thing about this plant is that it is a low and relatively fast grower. It should spread and cover the whole area in about two weeks time.
Finally, we carefully siphoned RODI water along with established tank water into the tank. By adding water from an already established tank, you don’t have to worry about cycling the tank and can add livestock right away. It’s natural for a newly filled tank to be slightly cloudy due to sediments from the substrate. It should go away quickly with proper filtration and/or water changes.

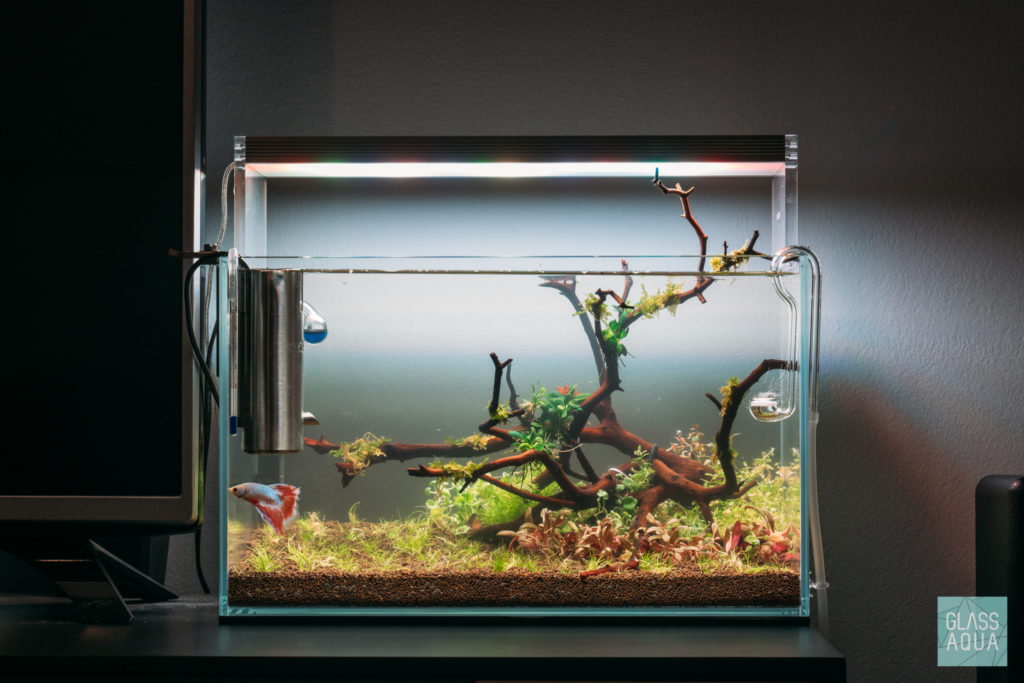
In about two days, you’ll start to see the plants perk up if adequate lighting and CO2 is provided. We normally do not add fertilizer to our planted tanks during its initial week since that’s when the nutrients from the substrate will be most potent. During the next few weeks we’ll slowly introduce fertilizers at half the recommended dosages and adjust from there.
PLANT LIST: Ludwigia Repens ‘super red’, Rotala Sp ‘pink’, Myriophyllum Sp Mini Guyana, Hydrocotyle Tripartita, Alternanthera Reineckii ‘mini’, Eleocharis Belem, Micranthemum Umbrosum, Taiwan Moss ‘mini’, Anubias Nana Pangolino
Tanks specifications and more information can be found here.
DISCLAIMER: I am in no way affiliated with the companies mentioned nor was I compensated for providing any information in this post. The views, opinions, and positions expressed in this article are solely my own and do not necessarily reflect the views, opinions or positions of Glass Aqua or any employee, affiliate, subsidiary or division thereof. Glass Aqua makes no representations as to accuracy, completeness, timeliness, suitability or validity of any information presented by individual authors and/or commenters on glassaqua.com/blog and will not be liable for any errors, omissions, or any losses, injuries or damages arising from its display or use. All information is provided on an as-is basis.
Visit our online shop for similar planted aquarium equipment, hardscape, and plants