


Recently, there has been a surge of aquarium owners creating hybrid setups or converting their existing planted aquariums into paludariums using aquatic plants exclusively. With the rise of paludarium-like setups in the community, we thought we’d give it a go! And in the process, we decided to provide our readers with a full step by step DIY guide on how to make a simple, yet effective aquarium paludarium hybrid enclosure. Let’s call it an aqua-darium for short.
What is an Aqua-darium?
First, let’s get some terminology out of the way. A paludarium is an enclosed space or “container” that creates an environment able to house both terrestrial and aquatic living organisms. Basically, a paludarium, in the most general sense, is where land meets water. If you’re a long-time follower or reader of our blog, we’ll assume you know what an aquarium is. Combine elements of the two and you have yourself an aqua-darium.
So, for those of you thinking: well isn’t this just a paludarium then? Yes and no.
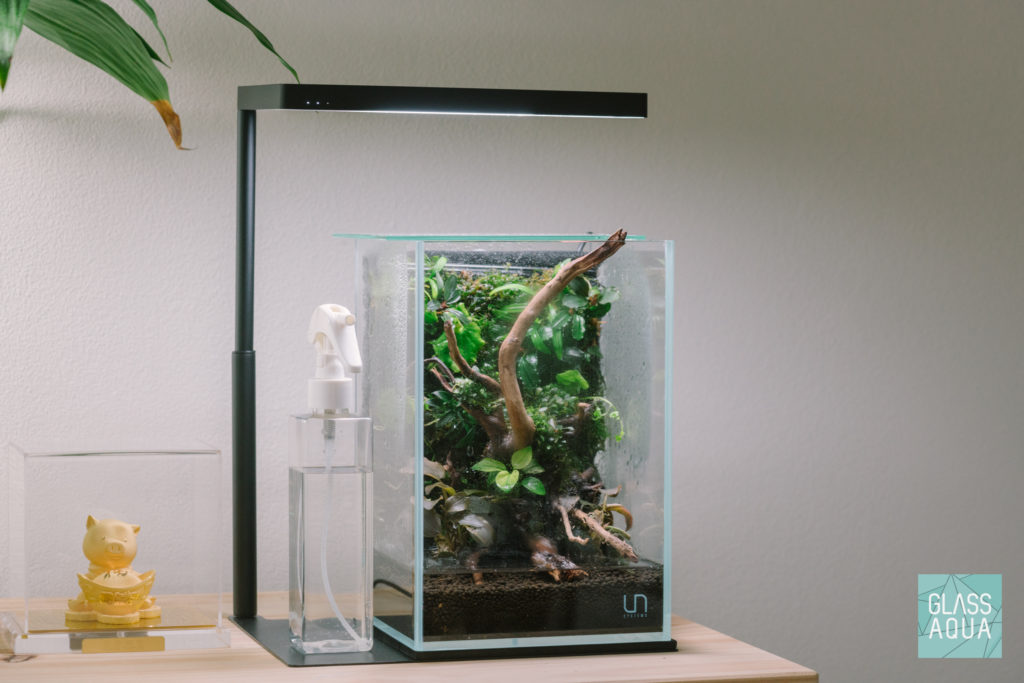
For our project, we decided to use aquarium plants exclusively because we are already accustomed to growing them and are familiar with the needs and requirements of all species used. In addition, we used an Ultum Nature Systems 16T Tall Aquarium for our enclosure along with aquarium-related goods to create this build. Essentially, there are more “aquarium” elements rather than paludarium specific items for our setup.
If you still don’t buy into the nomenclature, that’s okay – call this whatever you like. What to name this isn’t the topic here and this DIY project is too cool not to share! Let’s move onto what you’ll be needing.
What you’ll need
Here is a list of necessary items needed to build an aqua-darium:
- Aquarium tank
- Aquarium tank lid
- High-quality aquatic plant substrate – Aquario Neo Soil was our choice.
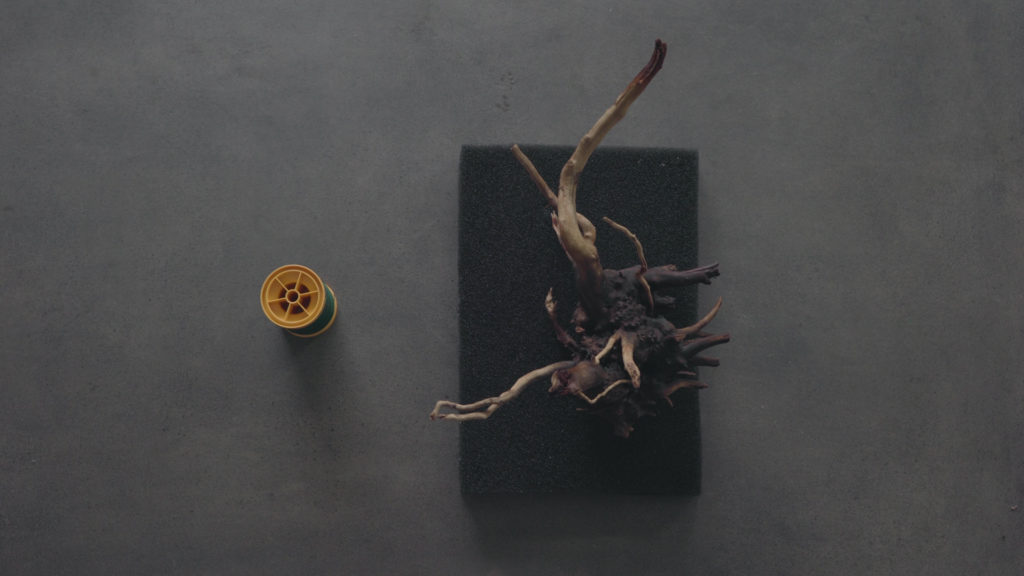
- Hardscape materials – In our example we used Spider Wood Nano.
- Planted aquarium light – We used an ONF Flat Nano + LED Light.
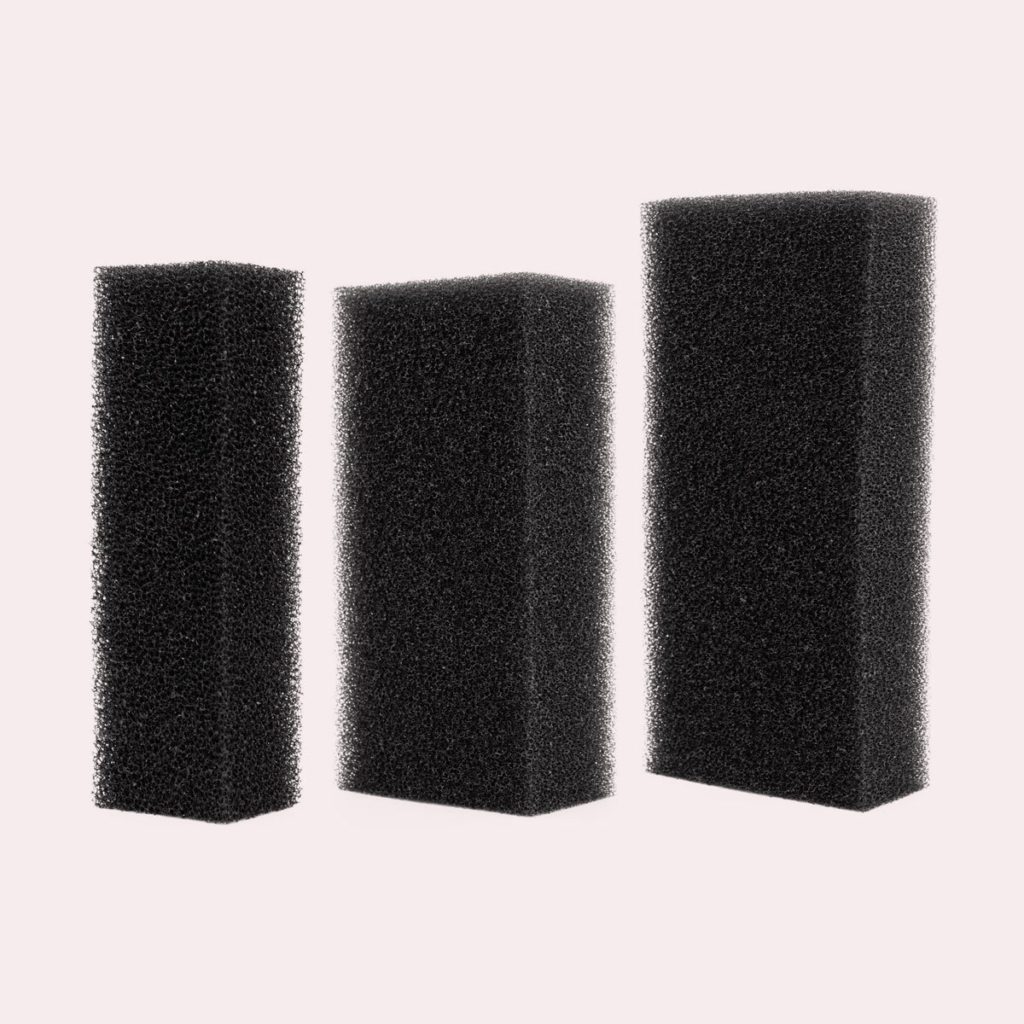
- Aquarium filter foam pad or Coco fiber mat
- Aquatic plants – Epiphytic aquarium plants and mosses work best.
- Airline tubing
- Airline suction cups – We used a total of 3 but using more suction cups will keep everything more tidier.
- Aquarium mini water pump – 50 – 80 gph is good for nano aquarium applications.
- Rigid acrylic tubing
- Aquascaping tweezers
- Mister spray bottle
- Plug-in timer – Optional if you are able to manually turn lights on and off consistently or if the light of your choice has a built-in timer.
- Drill or dremel tool with small drill bit set
- Hand sewing needle kit
- Cotton sewing thread
So where do I begin?
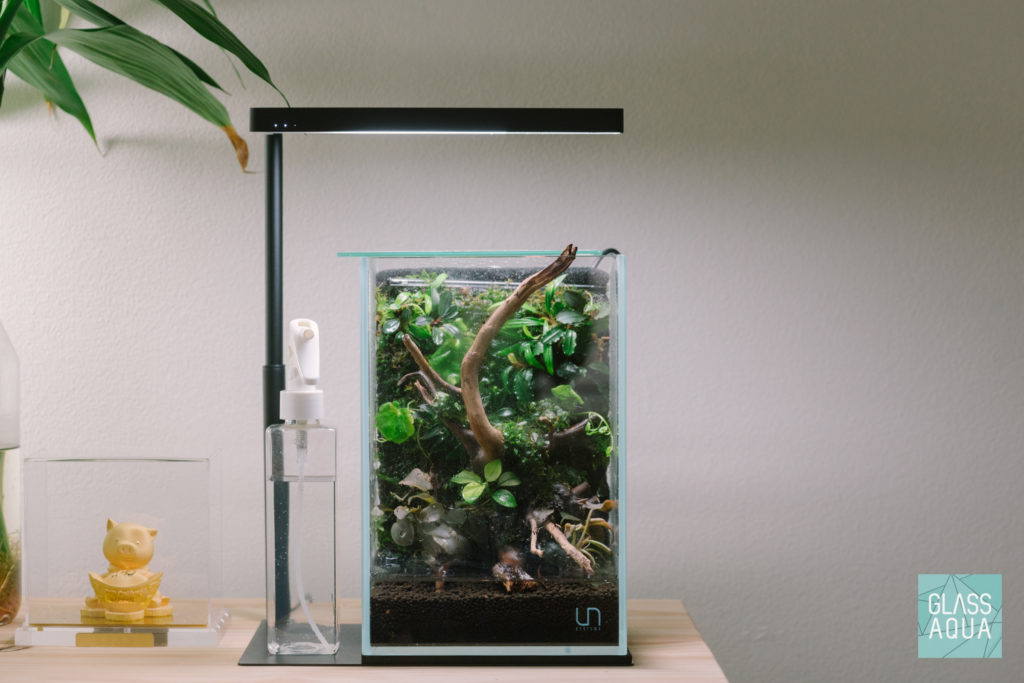
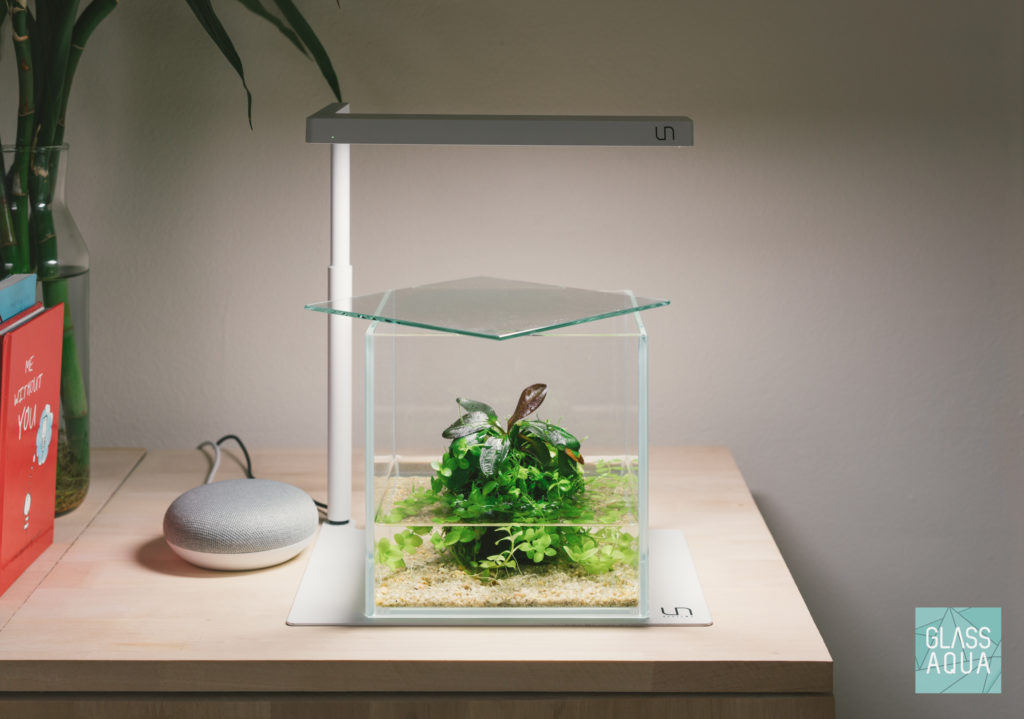
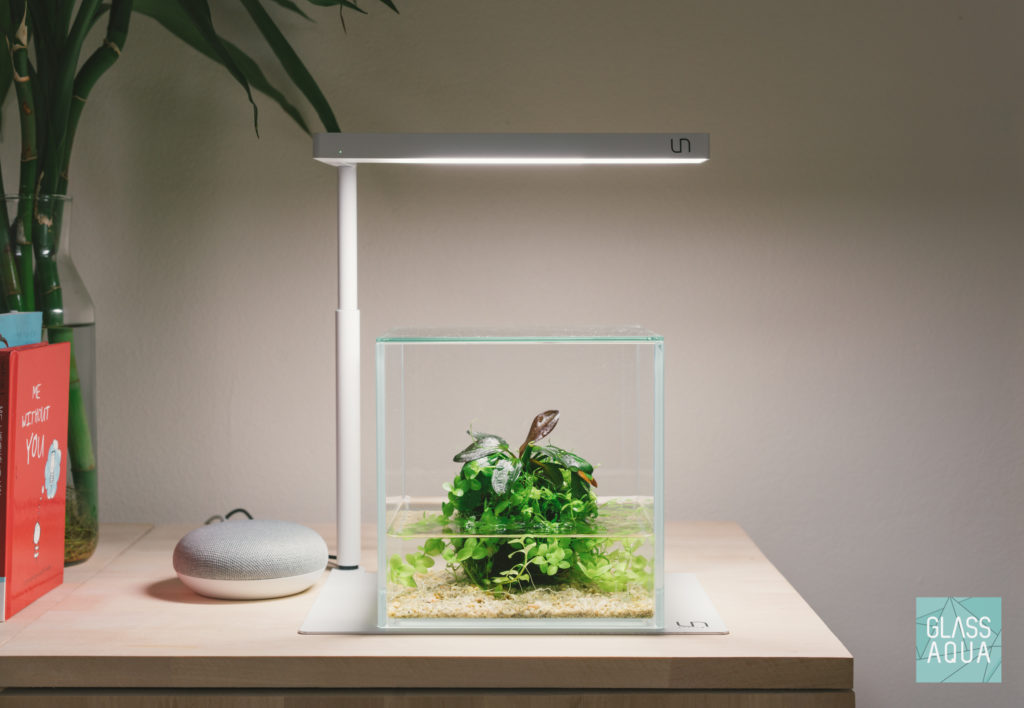
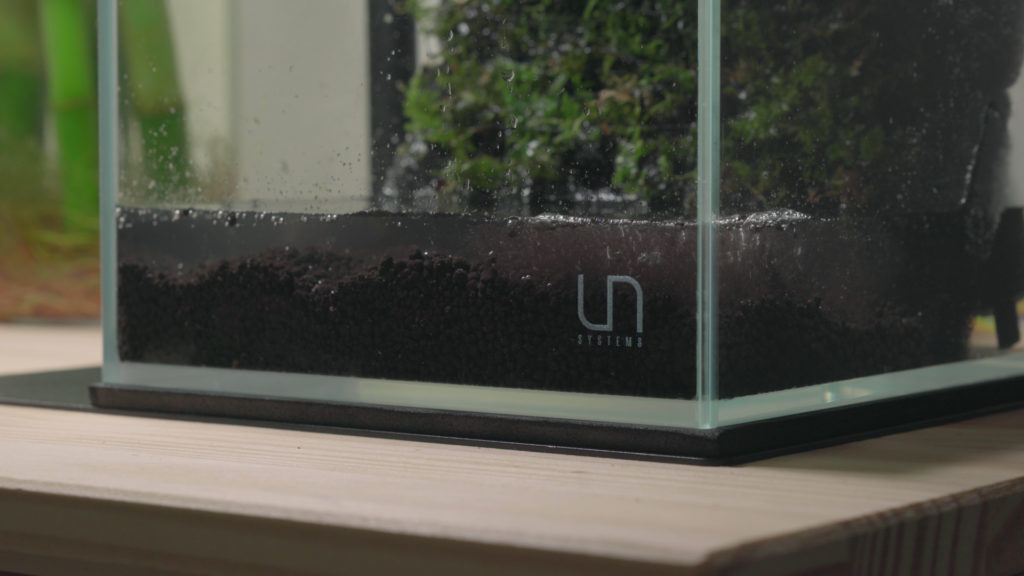
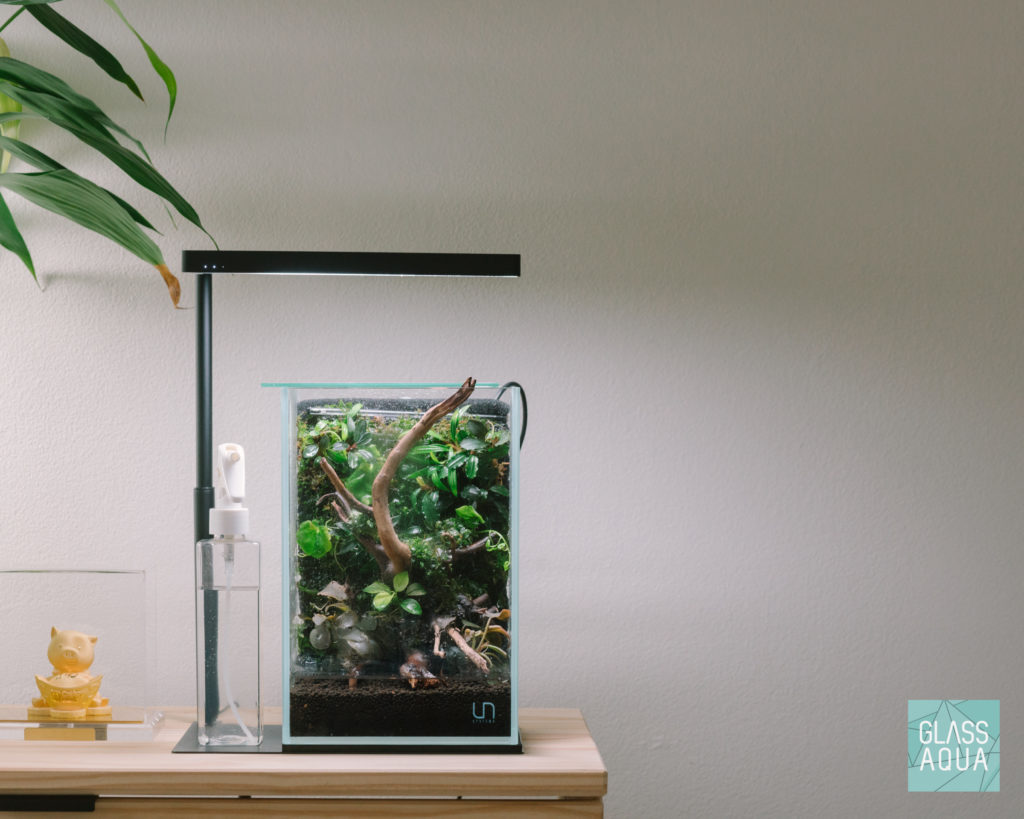
Before we dive into this aqua-darium build, you’ll need to choose an aquarium tank size that’s suitable for your space, budget, and lifestyle. In our case, we’re using an Ultum Nature Systems 16T Tall Tank. This aquarium tank comes in at 1.6 gallons and measures about 6.29 x 6.29 x 9.45” making this one of the smallest aquariums that Ultum Nature Systems offers. Overall, a UNS 16T takes up little space, is budget-friendly and requires minimal maintenance due to its smaller blueprint.

Ultum Nature Systems also conveniently produces a matching 16T glass lid that sits perfectly flush on both the UNS 16T and 16C tank models. The precise lines offer a beautiful aesthetic when installed.

UNS 16C Cube Aquarium with glass lid Glass lid sits flush
Once we settled on an aquarium tank size, we took a filter foam pad from a UNS 60A rimless aquarium, measured and cut to size a piece that would fit snug against the back panel of the UNS 16T. It’s important to note that the foam should be snug to ensure it sits properly against the aquarium tank’s back panel.
NOTE: These steps are not included in our visual guide or video below because aquarium tank size preference, budget and time available differ for everyone.
With the aquarium tank, lid and foam ready, we can now begin our aqua-darium build.
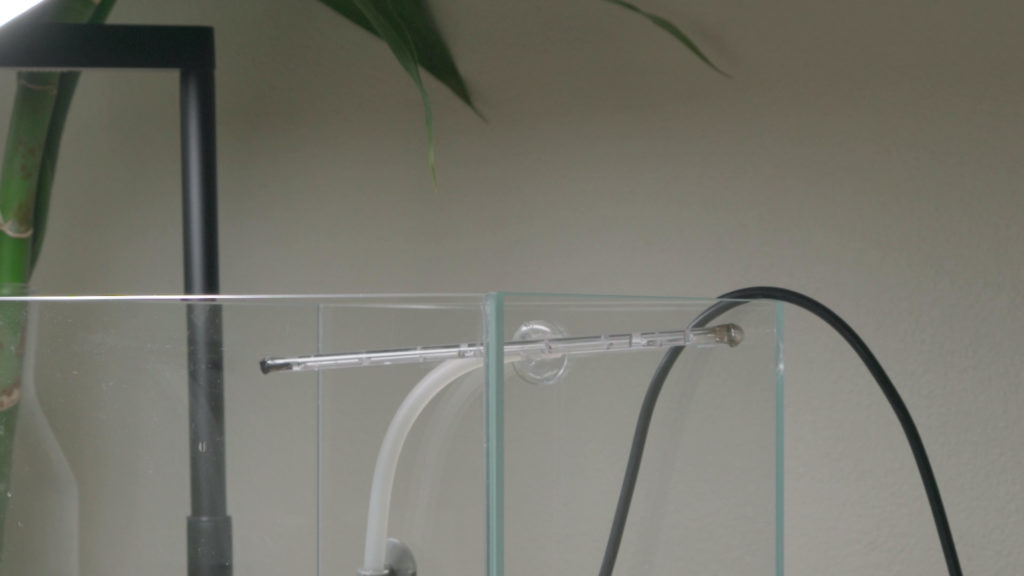
STEP 1 – Create a spray bar
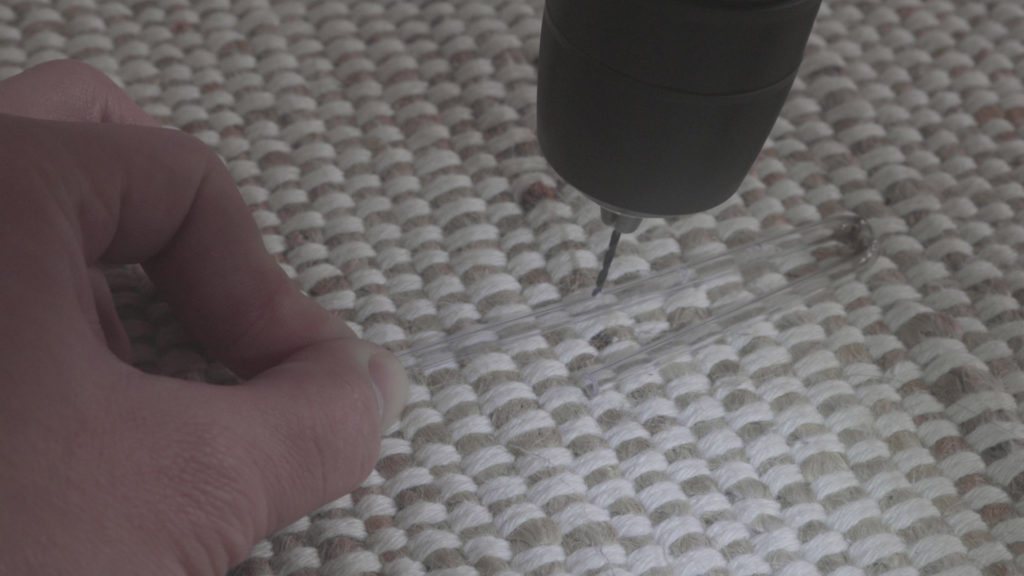
Forewarning, this is likely the most technical and difficult step. First, take the rigid acrylic tubing and cut it down to size. This will vary depending on the aquarium being used. In our case, we cut the rigid acrylic tubing to approximately 8” based on the UNS 16T. From there, the tubing was bent to be slightly shorter than the width of the tank to fit inside comfortably for easy installation. Before bending, the acrylic tubing should be heated slightly to make it more malleable and to prevent breakage. After bending, our acrylic tube measured approximately 5.75”. Watch the video below to see how we bend and shape acrylic.
Next, small holes were drilled into the tubing about 1/2″ apart on one side only using the smallest drill bit on hand. Extra care should be taken to ensure you do not drill all the way through the tubing to prevent incorrect water flow. You want the water to flow downwards only when installed. A small drill bit should also be used as using one that is too large will cause the water to exit through the first hole completely rather than distributing water evenly through all holes OR will result in the rigid acrylic tubing snapping.
To finish the spray bar, we simply plugged the end of the spray bar with a small piece of foam that we cut from the UNS 16T tank stabilizing mat. This material is malleable and will easily plug the spray bar you’ve just created.
STEP 2 – Setup the water pump
Insert airline tubing into the mini water pump and use suction cups to secure it to the back glass panel of the aquarium you’re using. The smaller the pump, the less power it will have and the less space it will occupy (this also means more planting space). Please select a pump that is appropriate for your aquarium size.
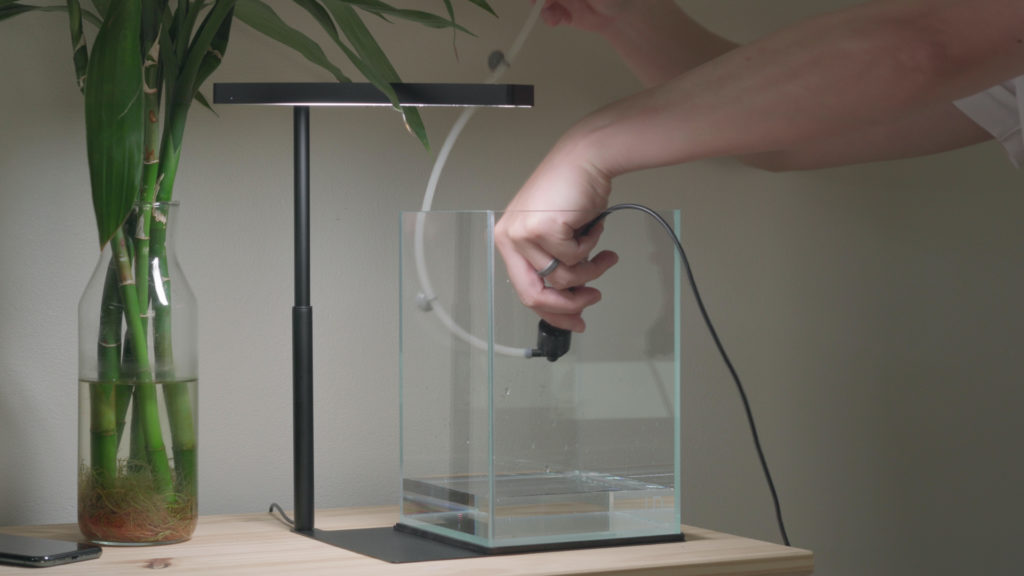
STEP 3 – Install the spray bar and test
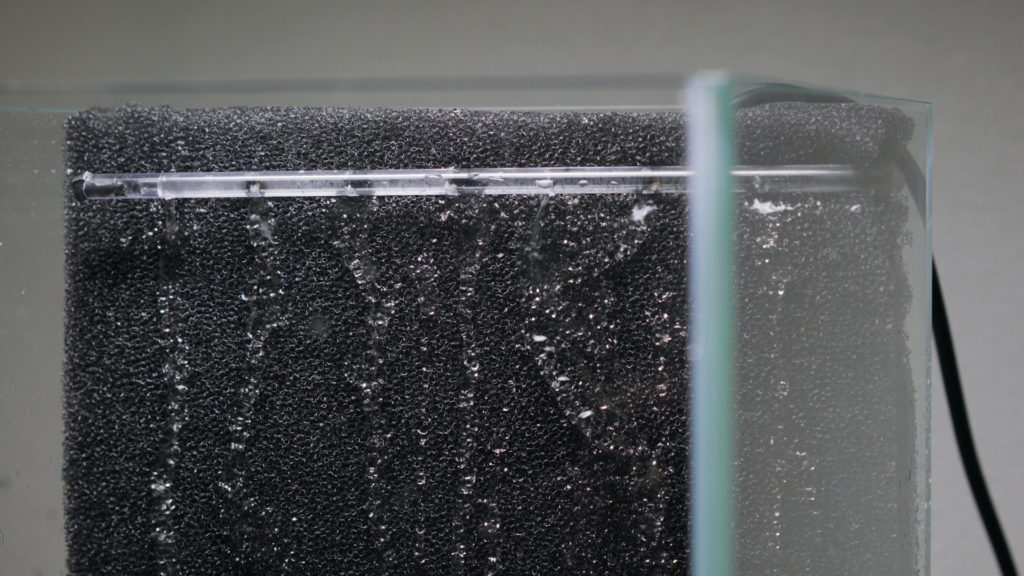
Connect the spray bar to the airline tubing and secure it. Ideally, installation should be near the top of the aquarium to ensure water flows through the entire height of the aquarium foam pad. After we ensured that the pump was submerged and connections were secure, we powered it on to ensure smooth operation. If water is flowing evenly through all holes drilled into the spray bar, voilà! You’ve successfully created a spray bar and are on the way to a successful aqua-darium.
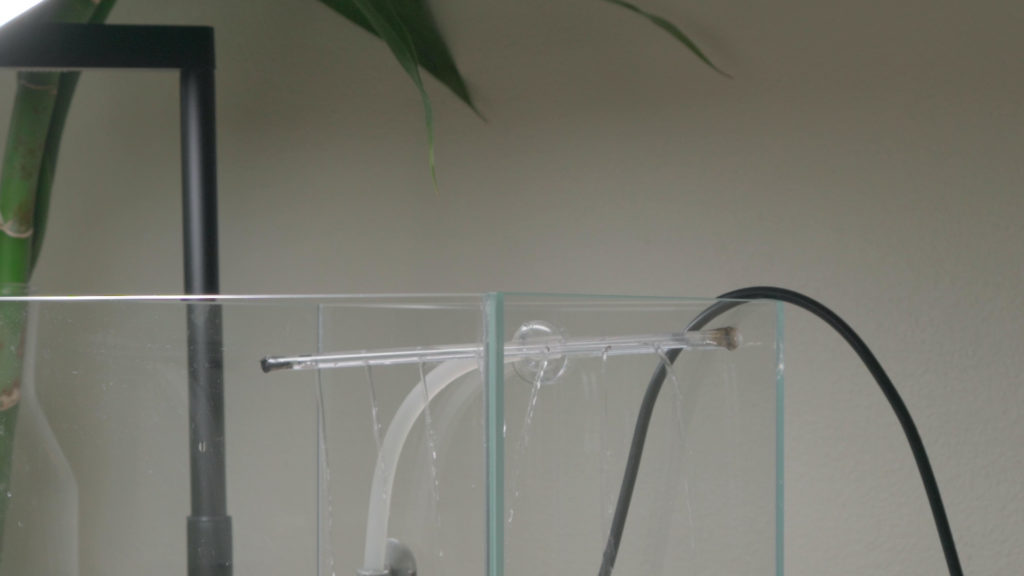
NOTE: We use RODI water to avoid unsightly hard water stains and marks on the glass panels that result from humid conditions that are required for aquarium plants to survive.
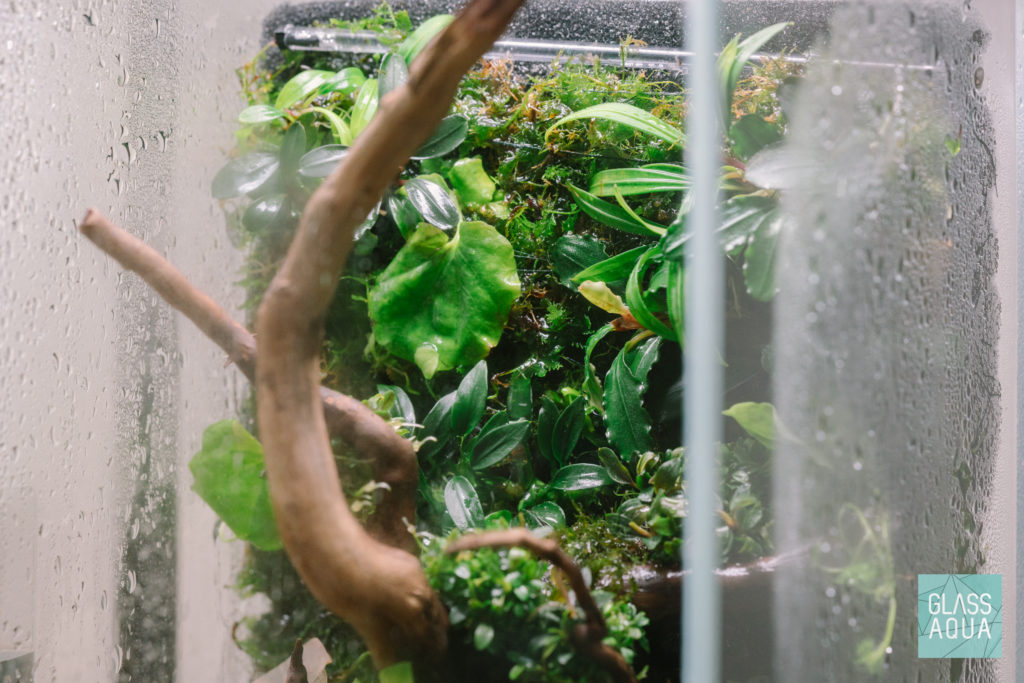
STEP 4 – Create your live plant wall
In order to hide the foam mat, we covered it in Little Triangle Moss. Little Triangle Moss is a unique aquatic moss that provides a natural, wild look. We’d also recommend Mini Christmas Moss, Christmas Moss, or Peacock Moss. However, any moss of your choosing will do. When covering your mat, try not to layer it on. Creating a layer that is too thick will result in the decay and rotting of the underlying parts that aren’t receiving any light.
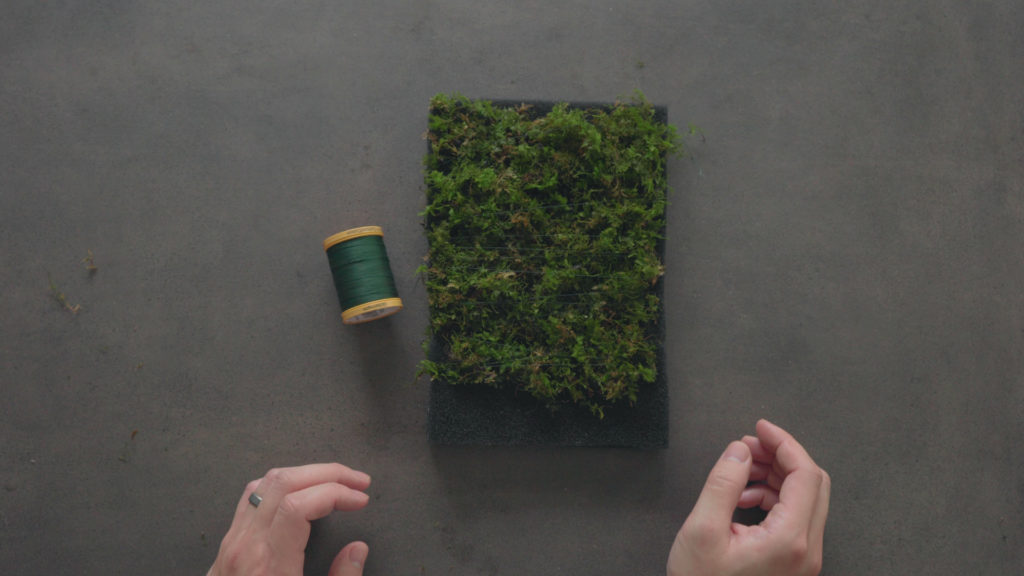
Next, we used a green cotton thread to wrap and secure the Little Triangle Moss in place. Green cotton thread is preferable as blends well and will eventually disintegrate over time. By then, any moss and plants used should typically be self-attached to the foam mat.
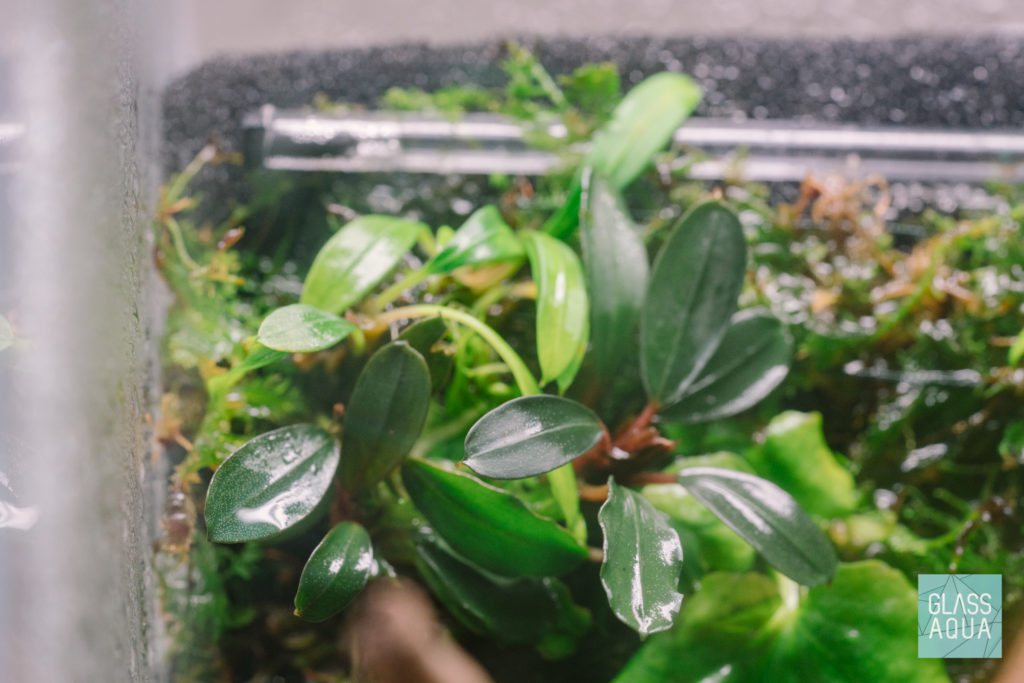
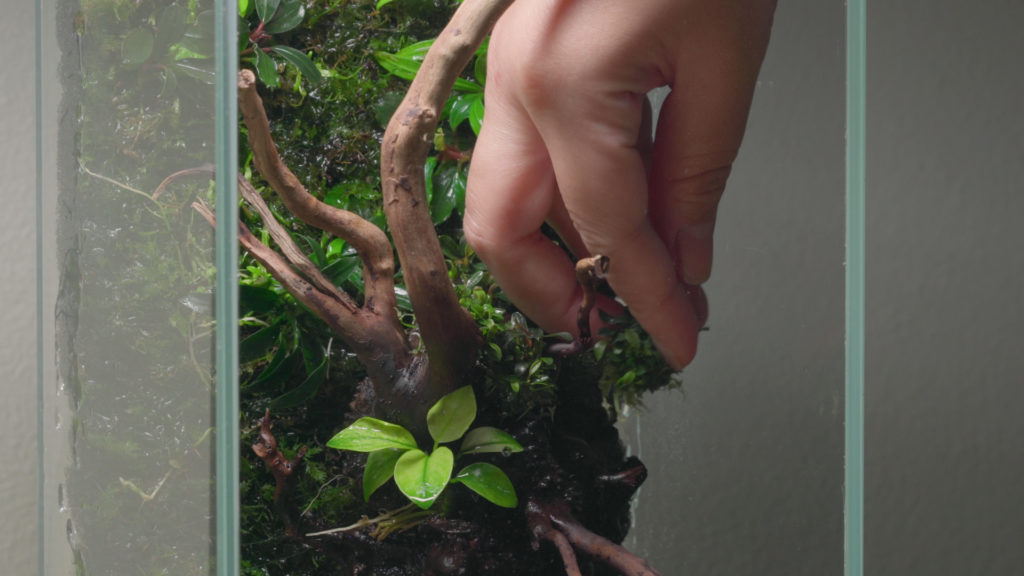
Once the aquarium foam is wrapped nicely in moss, placement for the rest of the aquarium rhizome plants is next. We recommend refraining from securing the rhizome plants too quickly and playing with the position first to ensure any hardscape being used does not block or damage anything. Once placement was finalized, we attached our assorted species of Anubias, Aridarum, Bucephalandra and more onto the moss wall by sewing.
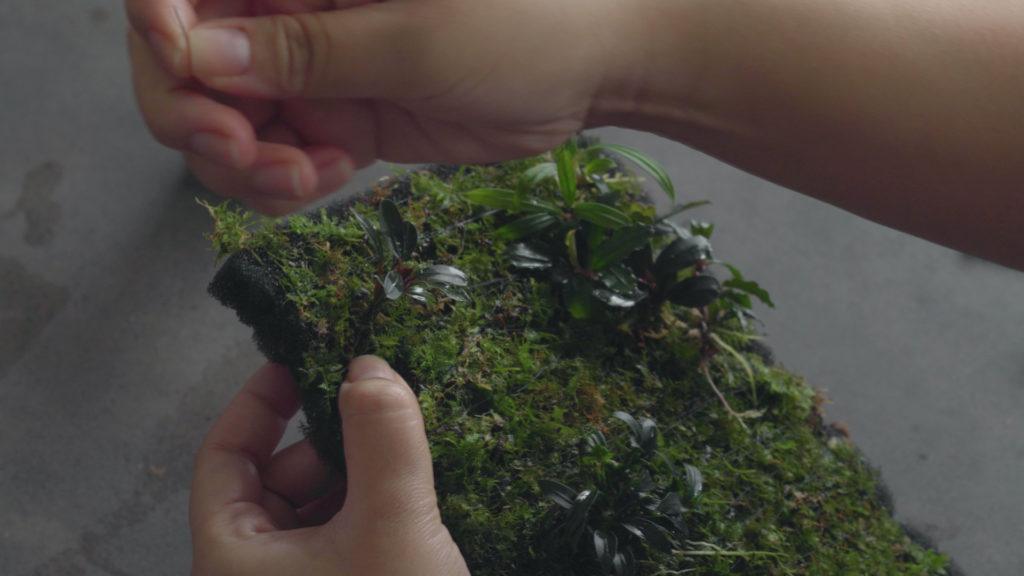

We threaded a needle with the same green cotton thread and sewed our rhizome aquarium plants in.
NOTE: We left about 1 – 1.5” at the bottom of the foam mat bare since it would be buried underneath the planted aquarium substrate soil level layer on.
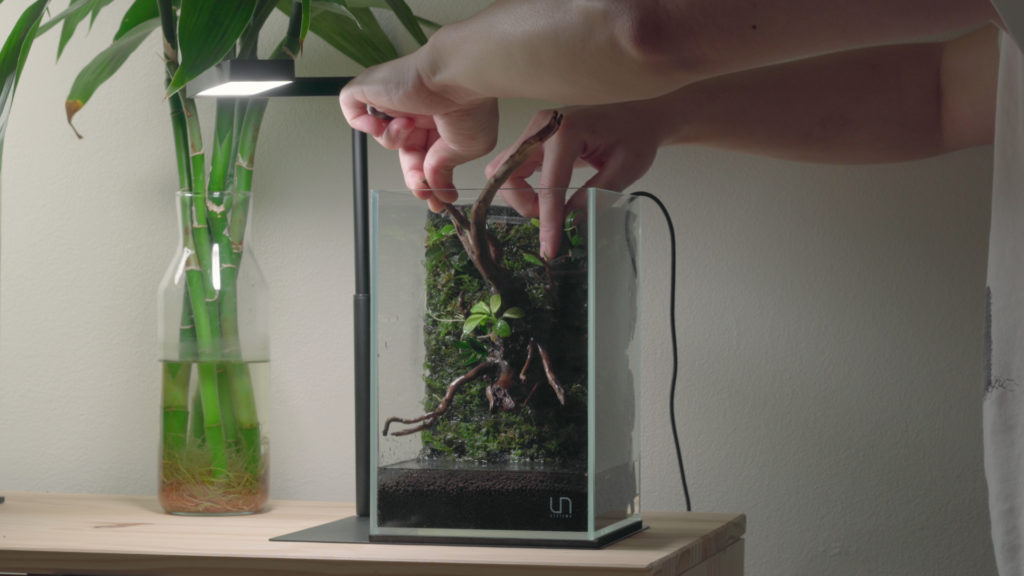
STEP 5 – Add hardscape and more plants
Once we were happy with the look of our newly created living moss wall, we had extra aquatic plants! We decided to adorn our Spider Wood Nano piece with the extra portions of Bucephalandra and Anubias rhizome plants to create a seamless blend into the background. Our favorite feature of aquarium rhizome plants such as Anubias, Bucephalandra, and ferns are their ability to grow without substrate or aquarium soil. They are typically lower maintenance as well and can be simply wedged into place making them very versatile! If you are using additional hardscape in your aqua-darium, set it aside until STEP 7. Don’t forget to keep your plants hydrated!

NOTE: Any type of aquarium hardscape will work in an aqua-darium setting. We personally love the contrast and look that dark green aquarium plants give when paired with wet aquarium driftwood. Get creative!
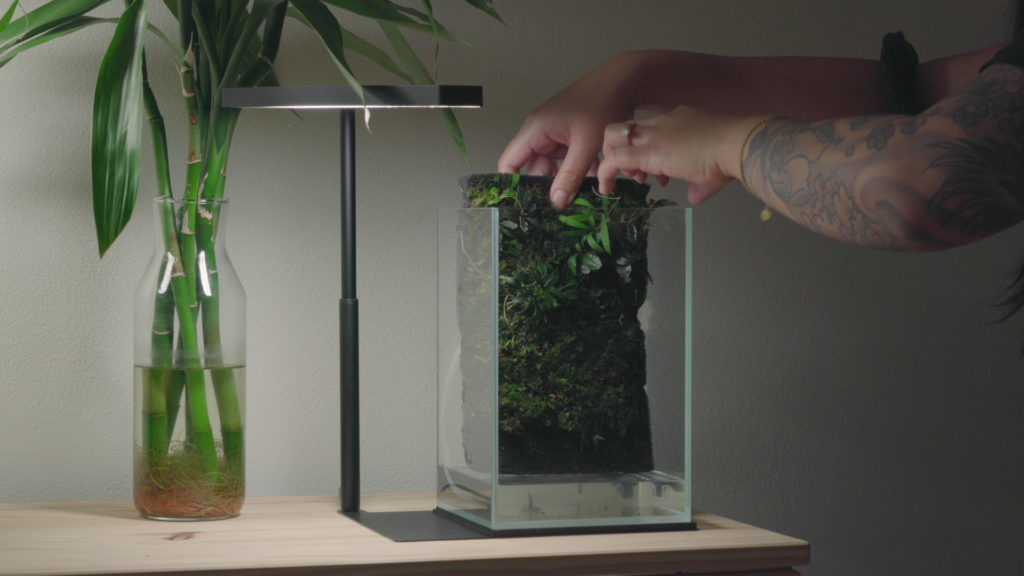
STEP 6 – Setting live plant wall
Once you’re happy with your live plant wall, gently slide the finished aquatic plant wall into place. Once snug, “clip” the spray bar onto it so the water will flow through the wall itself. The porous nature of the aquarium foam will soak the water like a sponge, keeping it consistently moist for the plants. Don’t forget to make sure the live plant wall is sitting on the bottom of the aquarium tank completely – This is important to ensure the aquarium substrate does NOT flow to the back of the tank where the aquarium pump is located. The live plant wall should create a natural barrier and prevent the pump from becoming clogged due to the aquarium substrate.
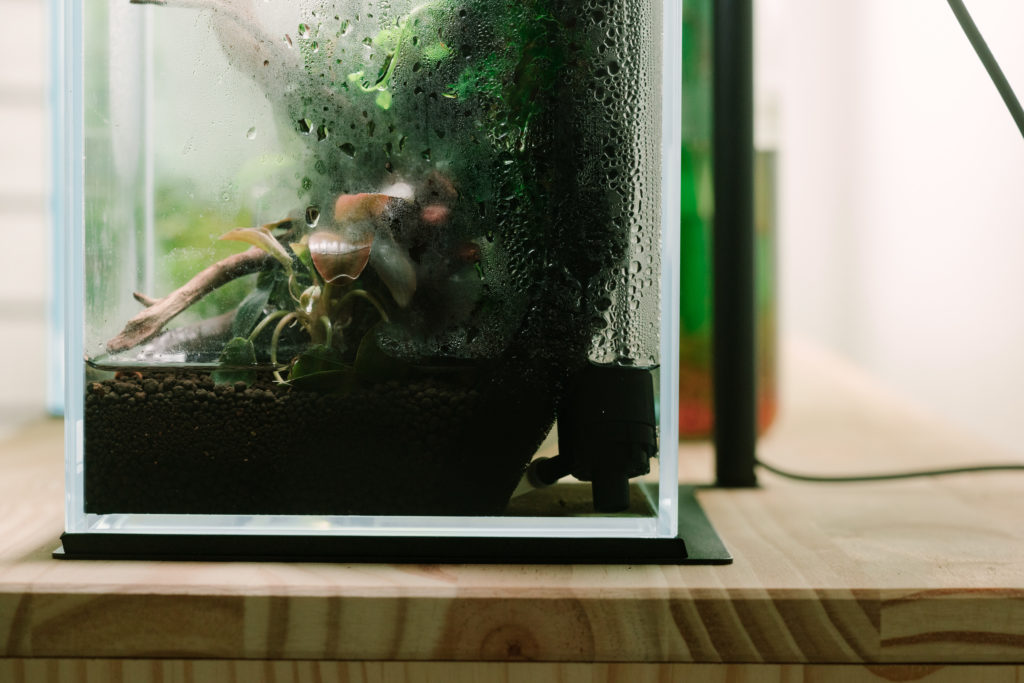
STEP 7 – Continue planting in your substrate layer
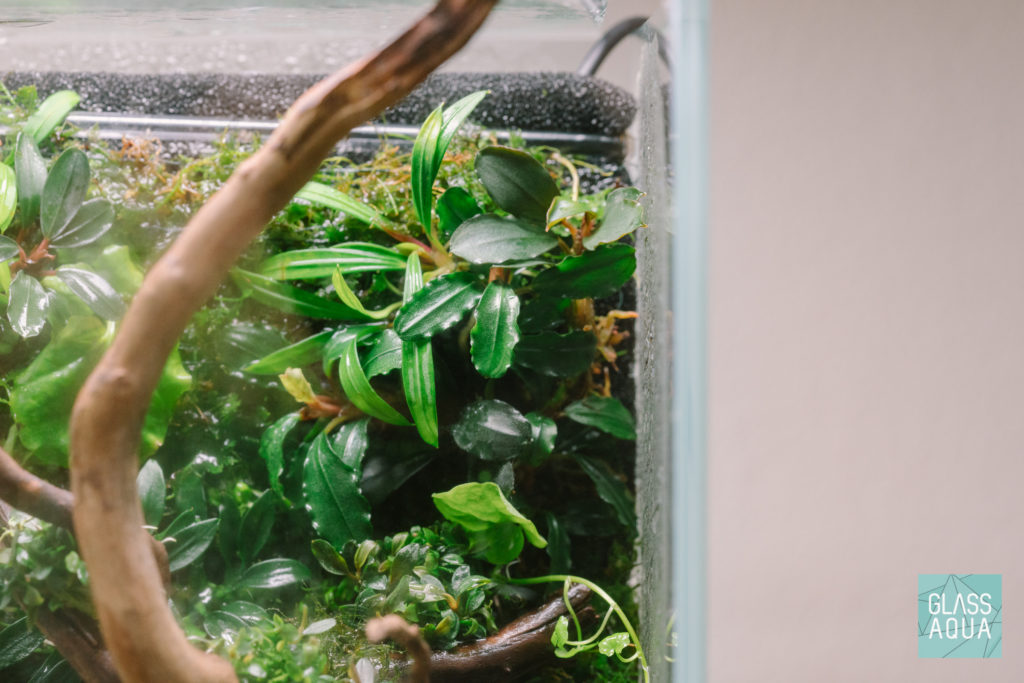
When the plant wall is set into place and the water pump is protected, gently pour a 1.5 – 2” thick layer of planted aquarium substrate. We used a stainless steel aquascaping Sand Flattener to level the soil so that it looks clean and neat. This is optional, but we highly recommend keeping a clean substrate line for an aesthetic appearance. Once your substrate is in, any additional hardscape should be added now. In our case, we carefully added in our Spider Wood Nano piece and adjusted its position to our liking on top of the aquarium soil and in front of the live plant wall.
We then added Lagenandra Meeboldii ‘Red’ in the surrounding foreground. More foreground plants can always be planted into the substrate at a later time.
STEP 8 – Complete your aqua-darium
Give the plants a good misting and ensure that the water level is still enough to submerge the water pump in the back. If not, add a little more water – just enough to submerge the pump and wet the aquarium substrate. Once you’re ready, power on the pump and set the glass lid onto the aquarium tank. A glass lid will generally maintain humidity levels suitable for a wide range of aquarium plant species. There is no need to fully cover the tank even if you reside in a dry climate area (we’re in sunny southern California). This concept is similar to our Dry Start Method, if not the exact same.
If plants appear dry, then feel free to mist away at any time. Take a step back, make adjustments or admire the completed project!
So what’s the hype behind Aqua-dariums?
A fully-fledged, high-tech planted aquarium can be intimidating and inevitably become costly really quickly. An aqua-darium poses the quite the opposite. There is a noticeable decrease in technical knowledge and equipment needed to start one. The following is a quick comparison between an aqua-darium and a traditional planted aquarium in respective topics:
CO2
A planted aquarium tank requires equipment to efficiently disperse CO2 throughout the water column. When running an aqua-darium, there is little need to worry as the environment naturally provides plenty of atmospheric CO2.
Algae
Algae isn’t a cause for concern since there isn’t a pool of water that can support the growth of algae.
Lighting
Most aqua-darium appropriate plants are easy beginner aquarium plants that require minimal care and are forgiving of neglect.
Maintenance
The only maintenance you’ll need to perform is ensuring sure water levels remain high enough to completely submerge the water pump. A good misting is appreciated every now and then too!
Video how-to guide to Aqua-darium
Here’s a video we filmed showcasing the steps aforementioned and how we created our aqua-darium:
Aquarium plant list
The following are the aquarium plants we chose to use in our aqua-darium:
- Anubias Pangolino
- Anubias Broad White
- Aridarum Mini
- Bucephalandra Red Mini
- Bucephalandra Brownie Phoenix
- Bucephalandra Kedagang Round
- Cardamine Lyrata
- Fissidens Fontanus
- Lagenandra Meeboldii ‘Red’
- Little Triangle Moss
- Utricularia Graminifolia
Aquarium plants suitable for an aqua-darium environment are not limited to the list provided above. Any of the aquarium plants in our wabi kusa aquatic plants collection will work well in an aqua-darium!
Some tips and notes
We started off with the ONF Flat Nano + LED Light on for 6 hours at 50% brightness. We’ll adjust the brightness in the weeks to come depending on how the plants do. This is how we usually check if we’re providing the right amount of light without light testing meters. If the lower portions of the plants are wilting away, then in most cases, the current lighting levels aren’t sufficient and require adjustment. After brightness is adjusted to the desired level, we’ll slowly increase photoperiod hours from 6 hours and max out at 8 hours.

Another great plant wall mat media to use would be a slightly thicker coco fiber mat. We chose to use a filter foam mat as the base because we simply had it on hand. In fact, a lot of aquatic plants are grown on coco fiber mats. Otherwise, both are great choices for aquarium plants to grow on.
Final thoughts
Creating an aqua-darium has been one of the most fun DIY projects we’ve done. We took an existing concept and innovated it for our own enjoyment. We’re happy to share it with everyone who’s interested in creating one of their own. The aquarium hobby is a source of creativity, inspiration and artistry! This project is something we highly encourage and recommend for those who love plants in general. If this aqua-darium is slightly modified, it can even house typical freshwater aquarium livestock such as Tetras, Rasboras, Caridina Shrimp and much more.
If you use our guide and/or create an aqua-darium of your own, please be sure to tag us in your posts! We look forward to seeing them! 🙂
DISCLAIMER: Some of the links contained on this blog are affiliate links. This means that if you click on and/or make a purchase from the affiliate through certain links on this blog or through any related social media platforms, we may receive a commission.
John from Glass Aqua is a participant in the Amazon Services LLC Associates Program, an affiliate advertising program designed to provide a means for sites to earn advertising fees by advertising and linking to Amazon.com.