


It’s not uncommon for us to consistently rescape our planted aquarium tanks since there are always new styles, aquatic plants that we’d like to try or simply an itch to switch things up. Aquascaping is always evolving and innovative methods of planting aquarium plants along with new hardscape materials pop up all the time. There are some aquarium tank layouts that we like to keep up and running long-term just to see how the aquatic plants and overall aquascape will age and develop.


We recently decided that we wanted to make some changes to our most popular Iwagumi style aquascape, but we also didn’t want to tear it down completely. The changes we decided on were not only for cosmetic purposes but also allowed us to experiment with alternative aquascape layout builds and aquatic planting methods. Our main focus for this rescape was to address what we’ve learned, make small corrections, continue with the positives and improve our skills as aquascapers. After maintaining this planted aquarium tank over the course of the year, here are our findings:
- The original slopes deteriorated slightly over time due to solely using larger granule sized aquarium soil.
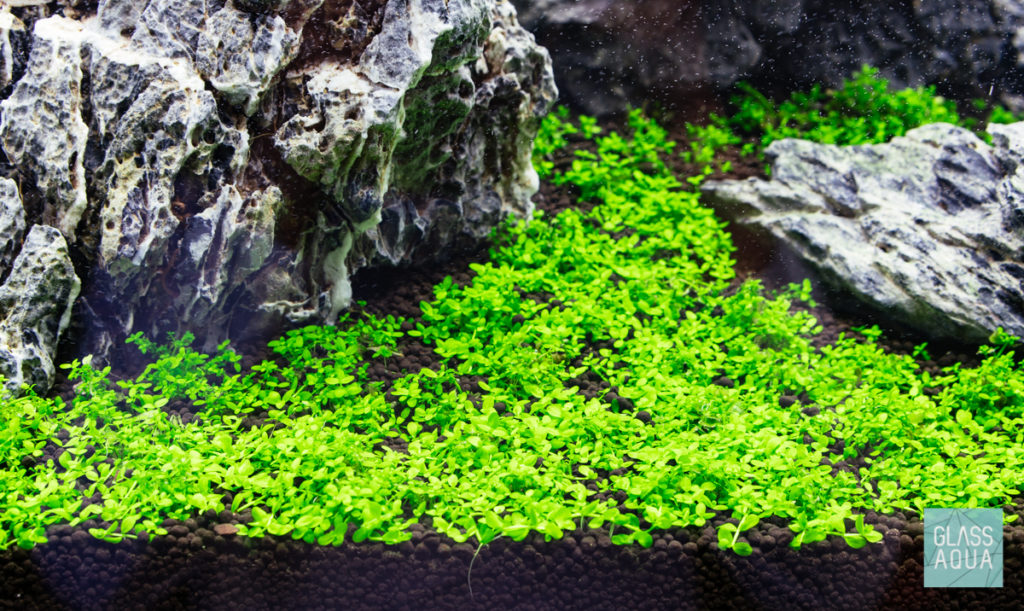
- Despite planting fairly densely, our initial portions of Micranthemum Monte Carlo Tissue Culture aquatic plant were still much too large and clumped together. This resulted in slower growth and also the possibility of the clump loosening from the substrate.
- Our strict maintenance routine implemented resulted in a 100% algae-free planted aquarium tank.
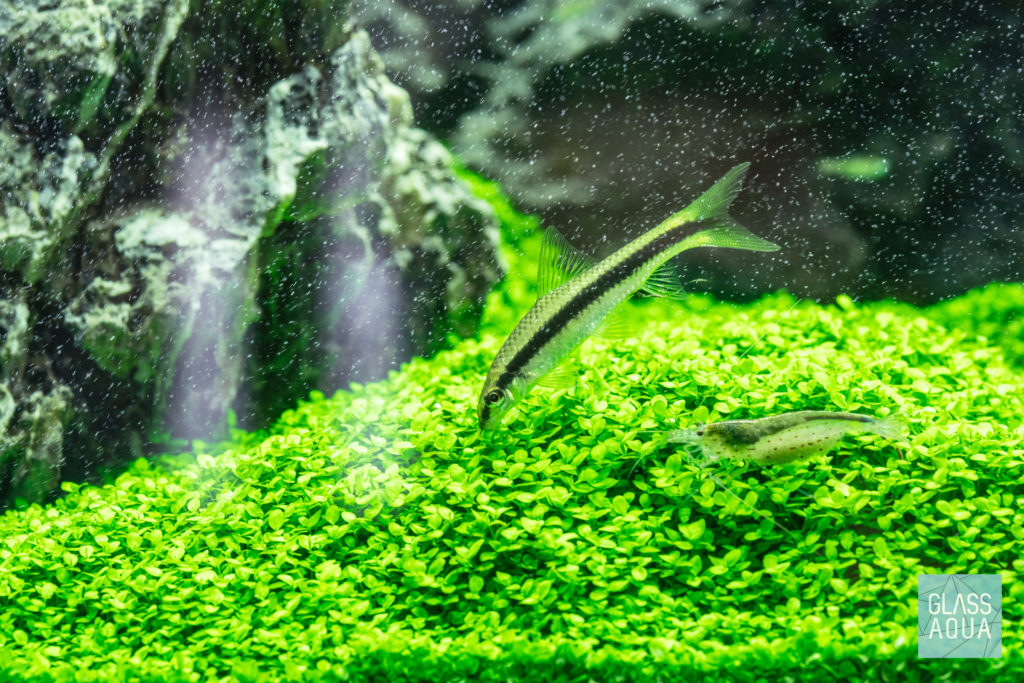
- The addition of an algae destruction team very early on helped to maintain an extremely clean planted tank
Why did we decide to rescape and replant our Iwagumi style planted tank?
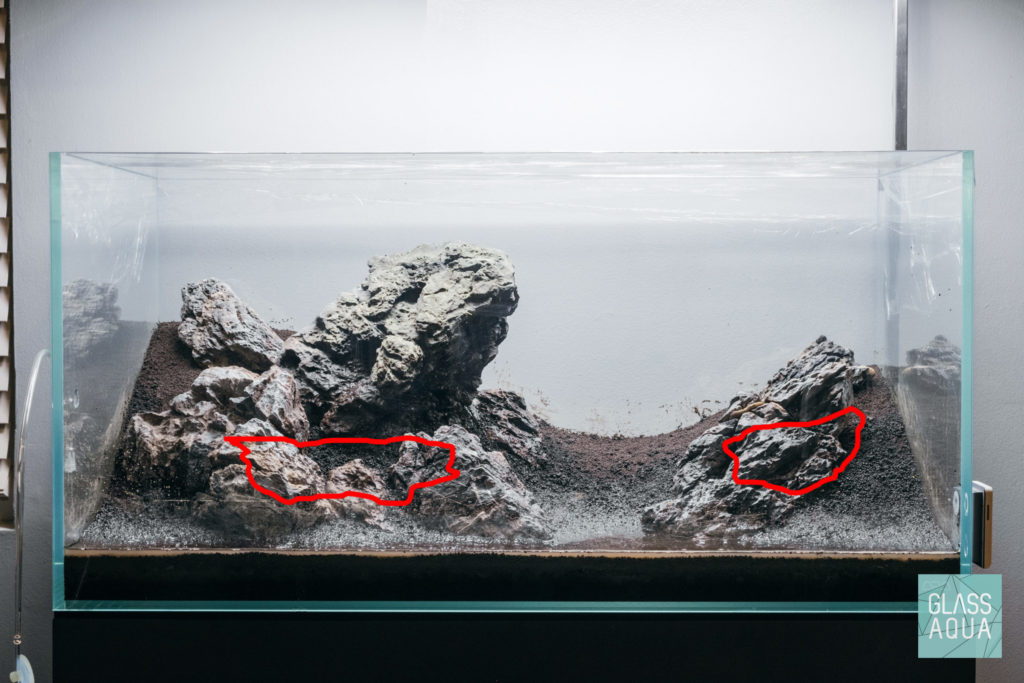
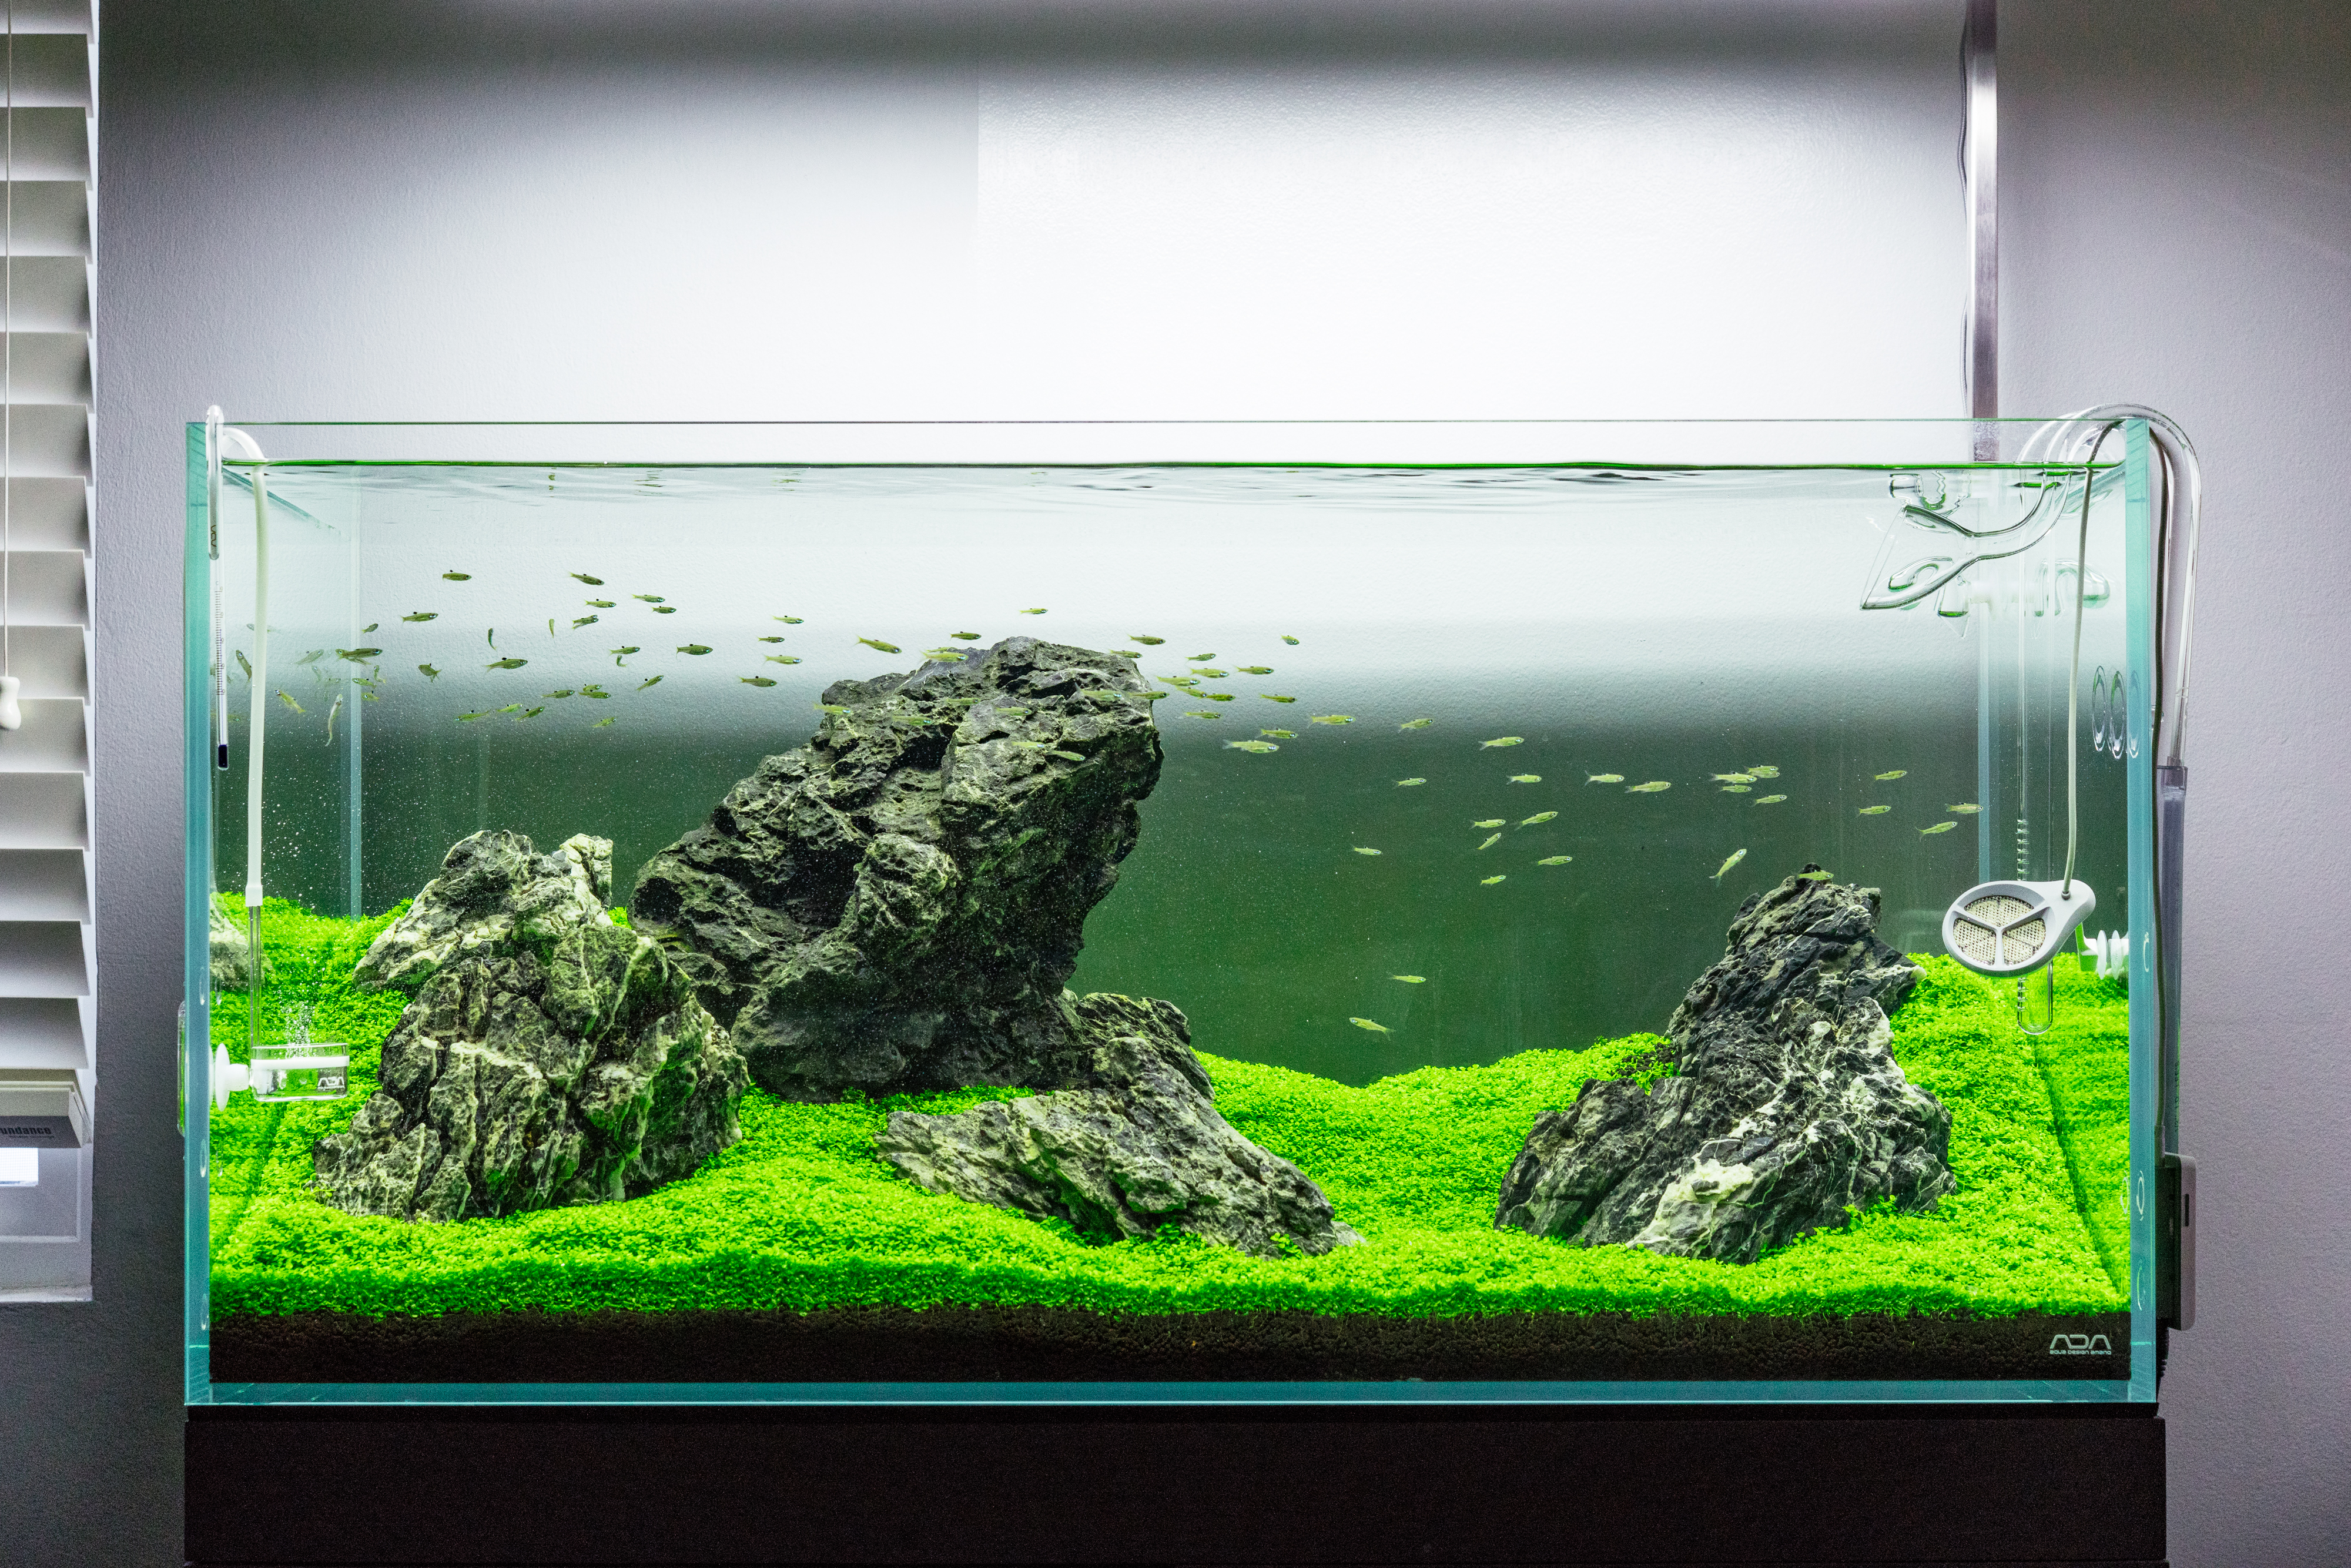
As mentioned prior, there was a lack of structural integrity that we overlooked in the original layout. Additionally, months of neglect resulted in extremely dense aquatic plant growth for our Micranthemum Monte Carlo warranting a major refresh. We also took this as an opportunity to make adjustments to the overall aquascape layout with new pieces of Ryuoh Stone.


What do I need to properly rescape a planted aquarium?
- New high-quality planted aquarium substrate soil. In our case, we originally used Tropica Aquarium Soil Normal. We decided to match it and add a fresh top layer of Tropica Aquarium Soil Powder. It is best to use the same soil and avoid mixing it with other planted aquarium substrates as the compositional differences may lead to unwanted algae problems. The number of bags needed will depend on what the user is trying to accomplish. In short, determine if you need to replace all existing planted aquarium substrate or just add a top-off. In our case we used a total of 12 new liters of planted aquarium substrate.
- New aquascape hardscape materials such as aquascaping rocks and/or aquarium driftwood. Referring back to our Iwagumi style planted aquarium tank, we kept 3 of the original Ryuoh Stones and replaced the rest with a new batch of aquascaping stones. Aquascaping stones with similar textures and coloration were chosen to ensure the aquascape layout remained cohesive in style. We recommend cleaning and rinsing both new and older stones before using.
- A fresh batch of aquarium plants. We decided to keep the Micranthemum Monte Carlo, but there are no rules here. The entire mat was removed and re-split into smaller portions for replanting.
- A pair of high-quality stainless steel tweezers or pinsettes will make a worldly difference. In this 44-gallon rimless aquarium tank, speed and reliability were crucial. Our goal was to plant densely and quickly to ensure the aquatic plants did not dry out.
- Quarantine tank. This is highly dependent upon livestock that is being kept. We set up a quick quarantine tank with an established aquarium filter before the initial rescape to ensure current fish and invertebrates would be comfortable while we worked.
Steps to rescape a planted aquarium
- Drain around 50% of aquarium tank water to avoid any spills while removing aquarium hardscape, aquatic plants, and any aquarium equipment.
- Turn off aquarium filter in order to prevent potential clogs from stirred up detritus.
- Gently catch all livestock and rehome.
- Remove all aquarium plants and hardscape.
- Remove as much remaining aquarium tank water as possible while siphoning out any floating detritus.
- Scoop out between .5 – 1” of aquarium soil so that old aquatic plant roots do not rot while the new aquarium plants are establishing themselves.
- Reposition and/or replace hardscape layout to preference.
- Top-off with new planted aquarium substrate.
- Begin replanting new aquatic plants.
- Fill the completed planted aquarium tank with fresh water.
- Install and reset all previous aquarium equipment such as LED lighting, aquarium filter, CO2, etc.
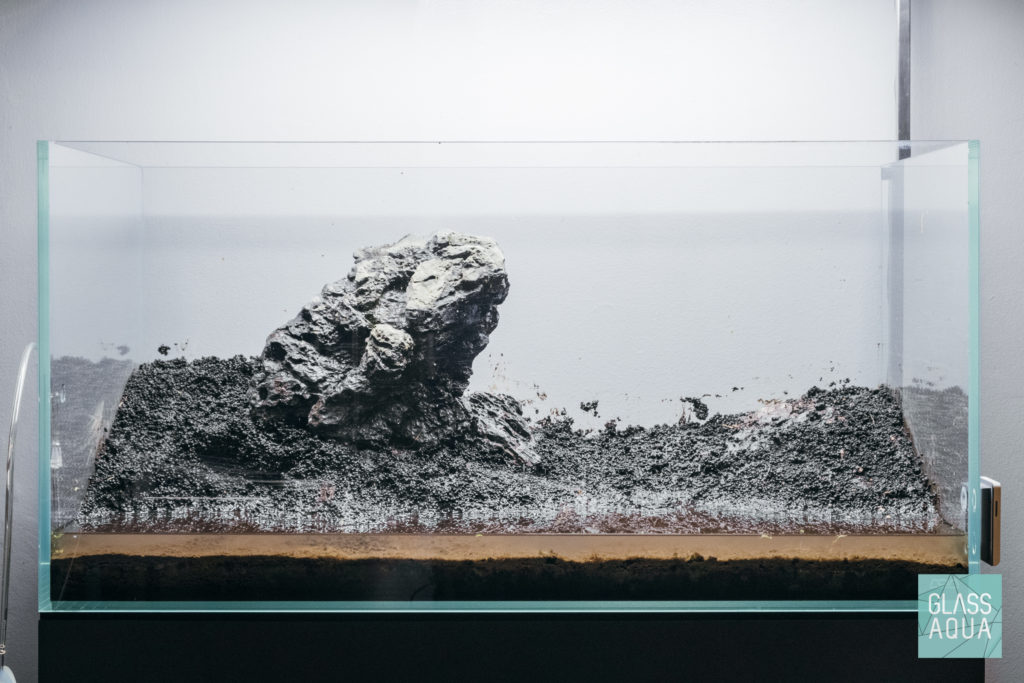
Creating dramatic aquarium substrate slopes
Many have asked how we created such high slopes that do not deteriorate over time. In order to do this, we employ several techniques that we learned and have had great success with:
- Burying large, preferably flat, aquascaping rocks underneath the substrate to provide hill support. This also saves some aquarium soil.
- Using finer granule sized aquarium soil as a top layer since finer grains will tend to hold better and not want to “roll off”.
- Using the aquarium hardscape itself to “fence” off and support steeper slopes.
- Planting extremely densely initially so the aquarium soil has nowhere to roll off.
- Use a higher quality soil that is denser and meant for the type of aquatic plant(s) you’re planting.
- Wetting the aquarium soil before you plant so that the soil “solidifies” prior to filling.


There are plenty of other methods to create dramatic hills in a planted aquarium; however, we prefer all natural methods.
Planted Aquarium Substrate choices explained
There are a wide variety of planted aquarium substrates available today. However, to understand what substrate is right for you, some questions must be asked and answered before purchase.
- What is your level of expertise in this hobby? Are you relatively new to the hobby or a seasoned aquascaper?
- What are your overall goals for this tank? A nicer fish tank or a contest-worthy showpiece?
- How much time can you dedicate to your planted aquarium? Just weekly water changes or a daily fiddle?
- How fast do you want your planted aquarium to develop? Watch it grow in months or watch it grow in days/weeks?
- What type of aquatic plant(s) are you planting?
There are various questions to be asked but the above are generally the most common ones we ask ourselves before setting up a new planted tank or rescaping one. In our example, we were already set on using the same aquarium equipment, changing the aquascape layout slightly, and maintaining the same routine. Since this planted aquarium is the main showpiece in our living room for all guests to enjoy, we knew we wanted sustainable long term aquatic plant growth. Knowing this, we have become dedicated to maintaining this planted tank regularly. And finally, because we are accustomed to this aquascape’s presence in our home, we wanted this planted aquarium tank to appear as though only a trim was performed. We decided to stick with the same high-quality, nutrient-rich planted aquarium substrate, Tropica Aquarium Soil. Below is a comparison between our two favorite planted aquarium subustrate soils:
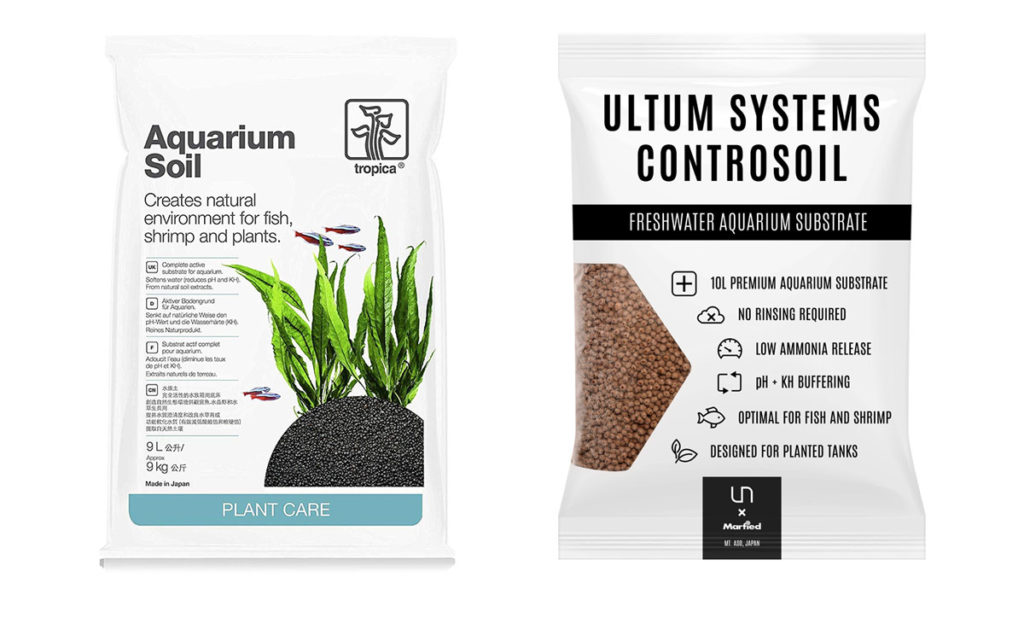
| Tropica Aquarium Soil | Ultum Nature Systems Controsoil | |
| Type | Distributive – comes loaded with nutrients to feed aquatic plants right away | Absorptive – takes up nutrients from water column or liquid aquatic plant fertilizers to feed aquatic plants |
| Nutrient Level | High – requires more water changes during initial setup | Low |
| Usage | Advanced Hobbyist | Beginner or hobbyists seeking less maintenance |
| Maintenance Level | High | Low |
| Plant Growth Rate | Fast | Slow to Fast – Depends on nutrients present in aquarium |
| Ammonia Levels | Moderate – to assist in cycling an aquarium | Little to none – dependent on established aquarium filter media or liquid nitrifying bacteria |
| Water Cloudiness | Yes | No |
| Granule Sizes | Normal and Powder | Extra Fine, Fine, and Normal |

Replanting aquatic plants
There aren’t too many differences between planting a potted, bunched, tissue culture or established grown out aquarium plant. The most important factor is the aquatic plant’s health. Planting healthy established aquatic plants generally yields far better results in growth rate and health simply because the aquatic plant is already accustomed to in-tank growth. In our case, we decided to break up the healthiest parts of the Micranthemum Monte Carlo mat and split them into individual stems to plant one-by-one. Yes, you read correctly, we replanted a foreground aquatic plant, stem-by-stem. Once again, stem-by-stem, one-by-one. No, we’re not crazy.


Traditionally, we were taught to split aquatic foreground plants into .5 – 1” clumps for planting. However, we noticed that it took some time for the foreground to actually begin spreading since we self-diagnosed that the root structure was too focused on “untangling” first before spreading. In this new scenario, due to being planted stem-by-stem, we were able to speed up the actual growth of this aquatic plant. This is a direct result of the aquatic plant being able to focus on rooting into the planted aquarium substrate right away. Also, plants are less likely to loosen from the aquarium substrate and float away. Don’t forget, dense planting will prevent slope movement!


It’s also important to note that some planted aquarium substrates such as Tropica Aquarium Soil is easier to plant in if moist versus a substrate such as Ultum Nature Systems Controsoil which is easier to plant in dry.
Planted Aquarium Lighting schedule and CO2 levels
After the planting process, we slowly filled the aquarium tank back up with water and reinstalled all previous aquarium equipment:
- Canister filter with glass lily pipes
- Twinstar Algae Inhibitor Nano+
- Ultum Nature Sytems Dual-Stage CO2 Regulator
- Aquario Neo CO2 Diffuser (Large)
- CO2 glass drop checker
- ONF Flat ONE 36” Pendant LED Light
All our rescapes are treated as if they are new planted aquariums; Lighting and CO2 injection schedules are reset to fit appropriately. The schedule and levels are currently as follows:
| CO2 | LED Lighting | |
| Previous Layout [fully established] | 12 hr/day | 10 hr/day |
| After Rescape [just set up] | 8 hr/day | 6 hr/day |
Too much light and too little CO2 will result in a very likely algae outbreak in the beginning of a newly set up planted tank no matter how established the filter media is. This is simply due to the fact that the plant mass is still very underdeveloped and does not require extra nutrients. As a result, high levels of light and excess nutrients leads to an imbalanced aquarium, which promotes algae in a planted aquarium. This is very apparent in an Iwagumi aquascape since smaller foreground aquatic plants rely mainly on roots for nutrient absorption and not as much from the excess nutrients that are present in the aquarium’s water column. This is also what makes Iwagumi planted aquariums much more difficult than a Nature Aquarium style planted tank that relies heavily on aquatic stem plants that will readily and quickly uptake any and all excess nutrients in the tank.
Once the aquarium plants start to root and there is no visible algae, then we’ll go ahead and increase both the light and CO2 duration up one hour and eventually reach CO2 = 12 hours/day, light = 10 hours/day. This usually happens over the course of the first several weeks. Keep in mind that this schedule is not guaranteed to work for all planted aquarium scenarios and environments. All aquarium lighting and CO2 schedules should be set based on the planted tank setup, equipment, and maintenance routine.
It’s important to note that CO2 is only used by aquatic plants during lights on. Injecting CO2 in a planted aquarium overnight is not only wasteful but may lead to a catastrophic loss in livestock due to CO2 directly affecting the pH levels in a planted aquarium.
Once the aquarium lighting and CO2 schedule are set, it’s time to optimize and dial in the correct CO2 levels. The old school method of dialing in CO2 by counting bubbles per second or BPS for short is extremely inaccurate and too general. How many bubbles can a human actually count per second and if so, how accurate would they be? This is why we choose to rely heavily on a CO2 drop checker. All our planted tanks with CO2 injection are dialed in to display a bright lime green color.
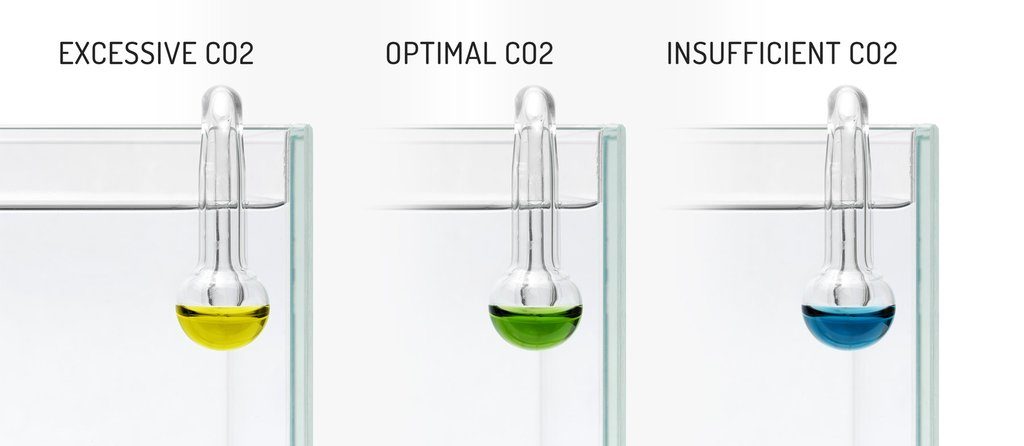
For those who like numbers, this is exactly a 1 pH drop from the pH readings in your tank while CO2 is turned off compared to when CO2 is turned on and stable throughout the day. This is why a high-quality and reliable aquarium CO2 regulator is extremely important in the planted aquarium hobby. A good CO2 regulator like the Ultum Nature Systems Dual Stage Regulator will be able to inject an extremely accurate, stable, and consistent supply of CO2 in a planted tank when needed. Another important piece of equipment is a reliable CO2 diffuser. Planted tank CO2 diffusers come in a variety of forms, materials, and sizes. Finding the one you need is contingent on personal preference and use. We chose to use our trusted and tested Aquario Neo CO2 diffuser for its extremely fine and efficient CO2 diffusion. Lower quality, replica CO2 diffusers are not able to produce the same levels of CO2 without wasting CO2 supply. Simply put, lower quality planted aquarium CO2 diffusers cannot produce a steady stream of fine mist and will instead inject unequal amounts of CO2 which can then lead to a decrease in aquatic plant growth and algae outbreaks.


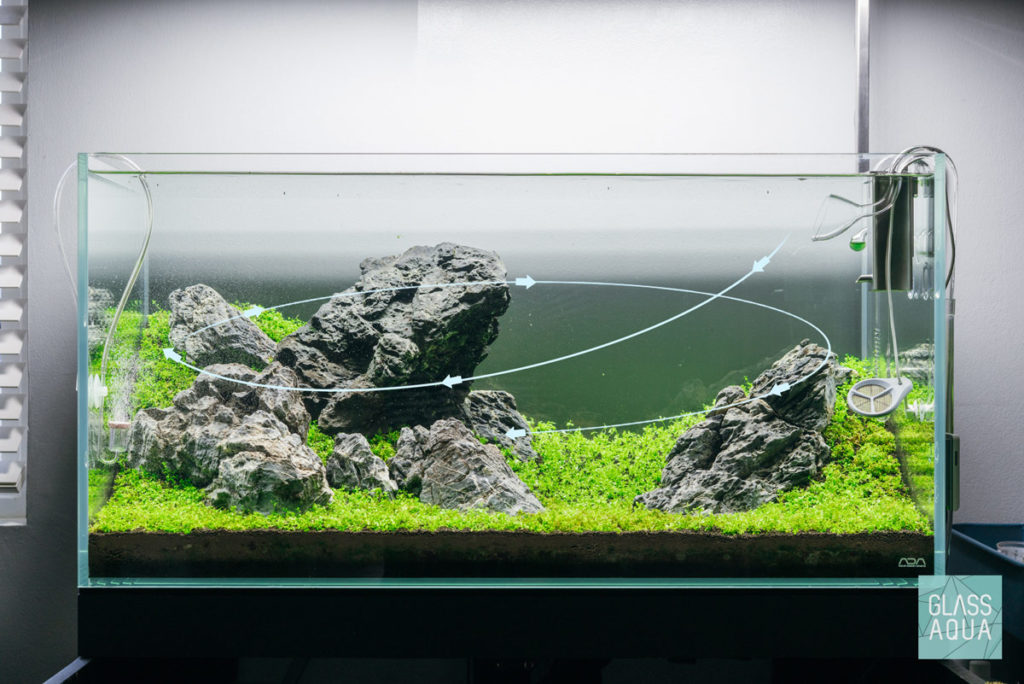
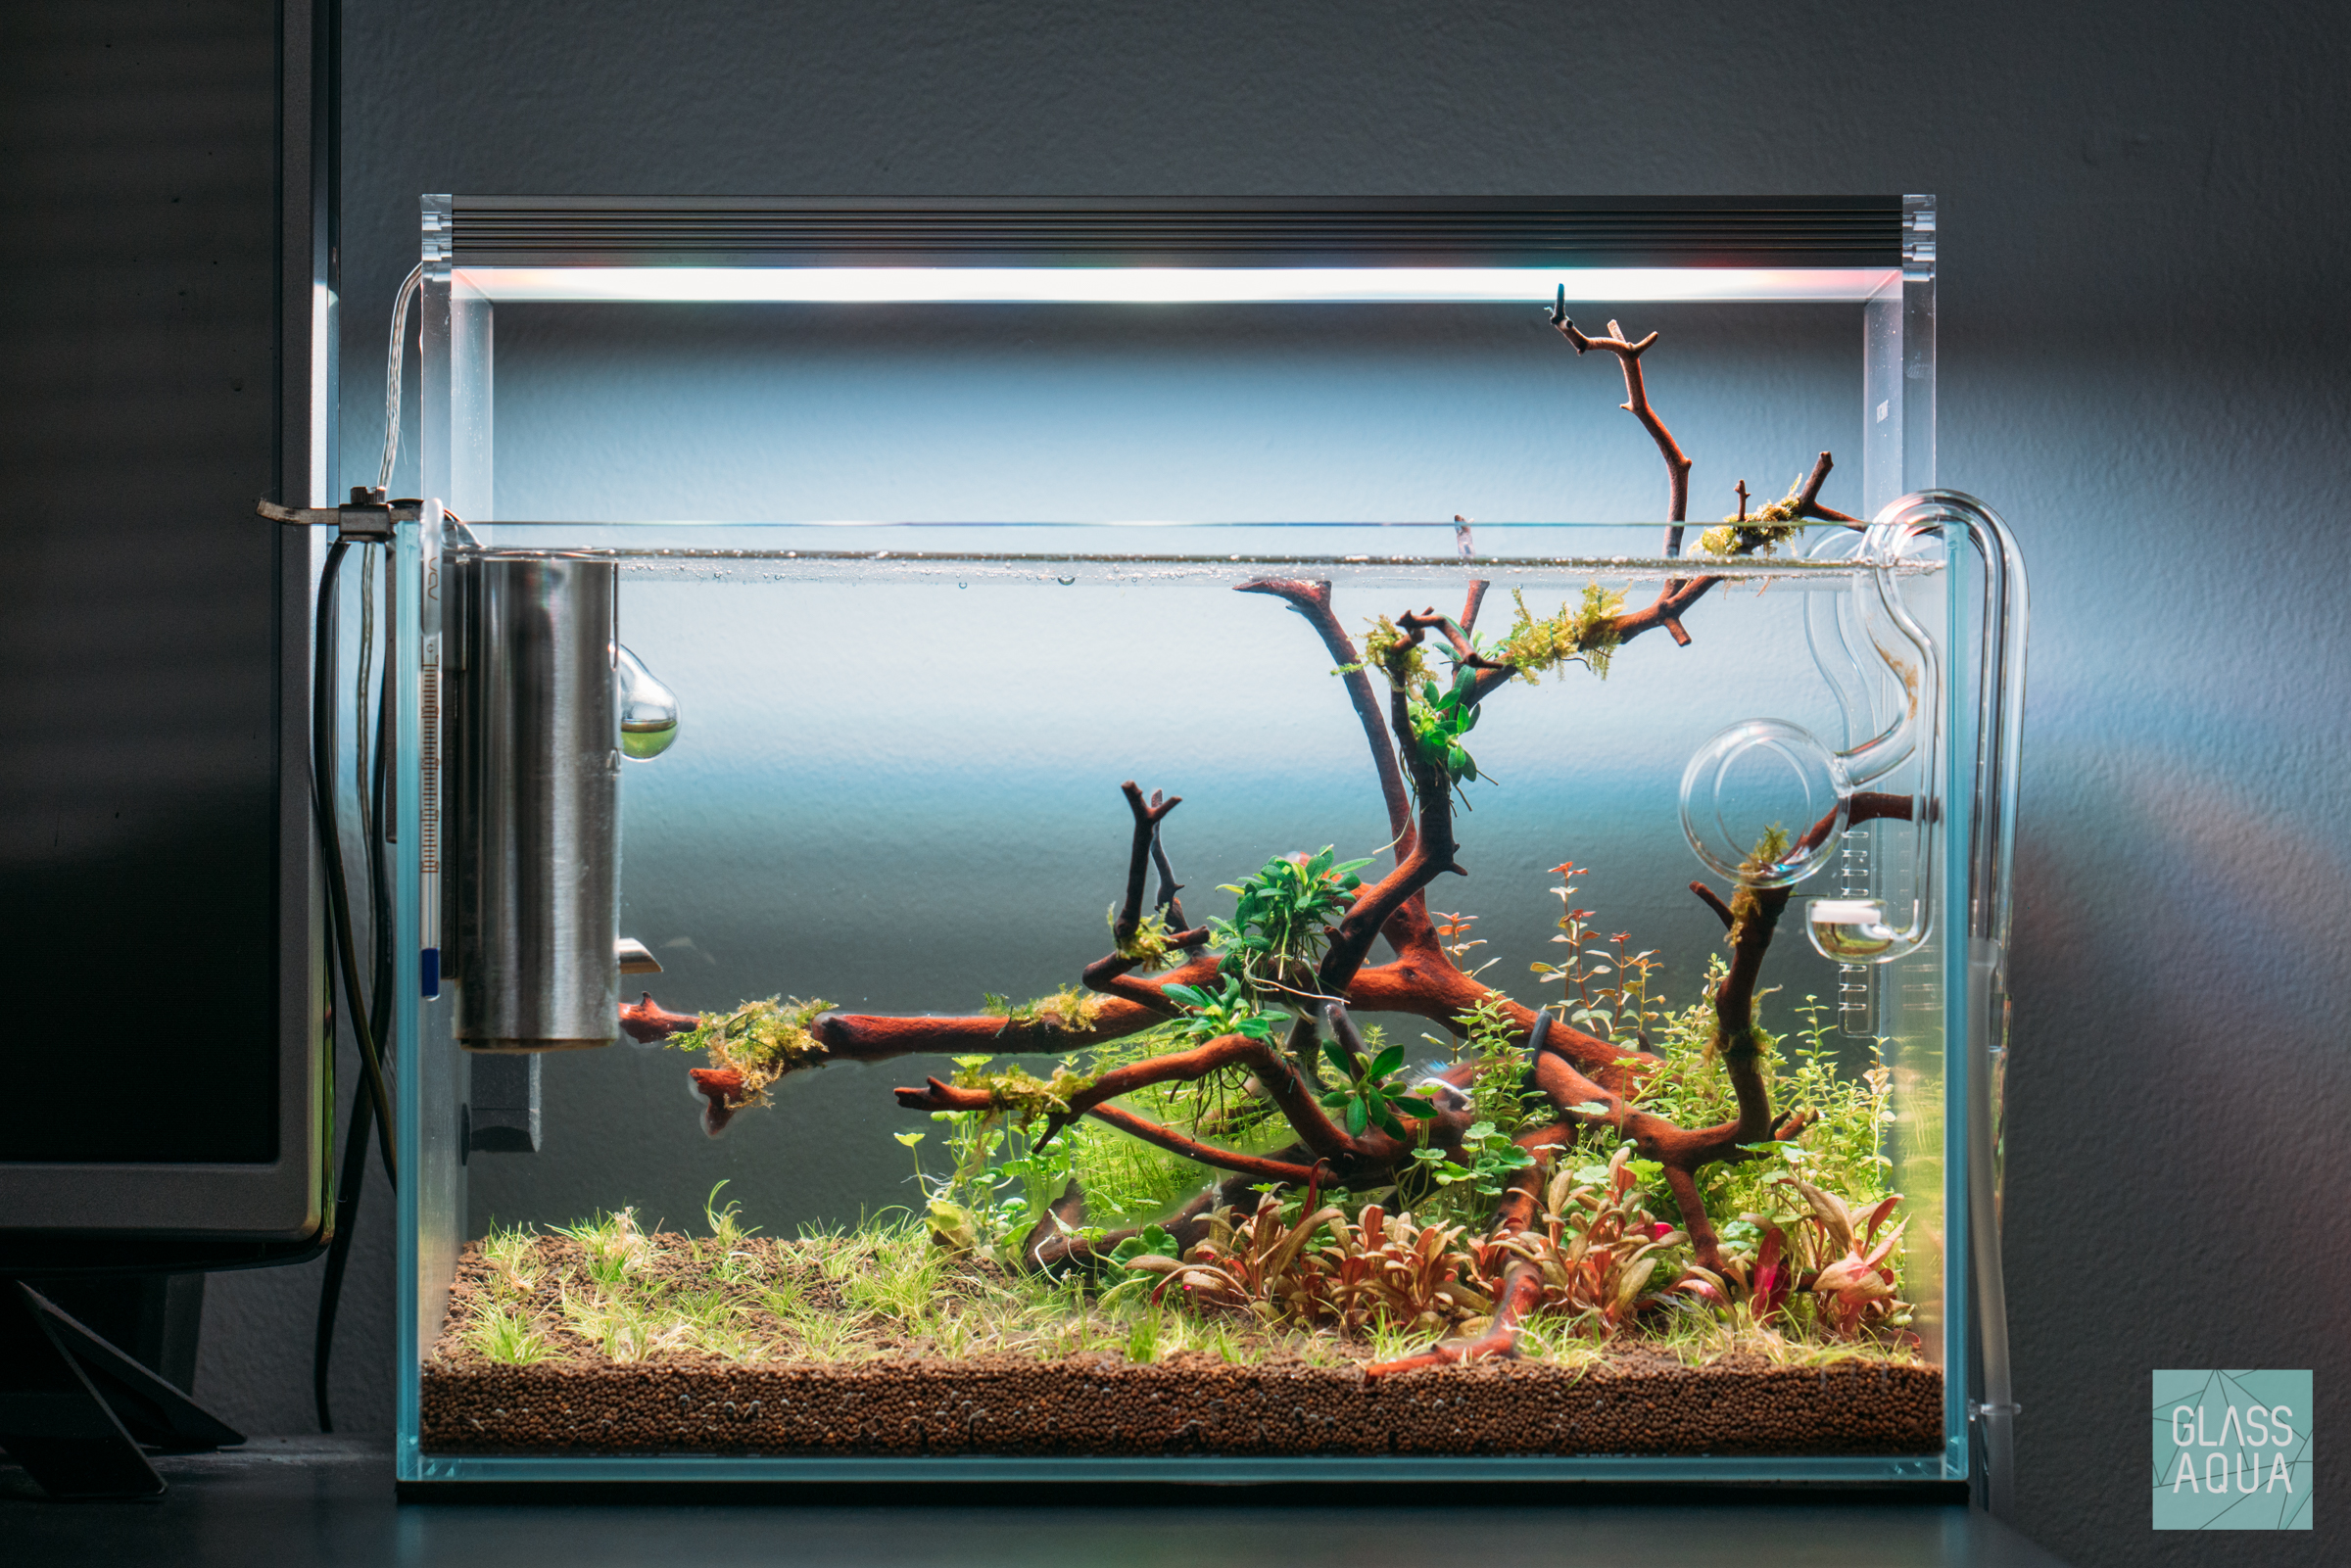
A side note: Basic aquarium water flow direction is crucial to the spread of diffused CO2. From the photo below, our glass lily pipes are positioned on the opposite end of the aquarium in order to “blow” and distribute the CO2 completely around the planted tank so that all aquatic plants are able to “absorb” CO2 readily. If placed in an obscure location, injected CO2 has the potential to be wasted.
Routine maintenance in a newly set up planted tank
We’ve never had trouble in a planted aquarium that was well-cared for. It’s very important to note that a planted aquarium requires attention. This is something a planted aquarium hobbyist should always consider before starting one.
| LIGHTING LEVEL | CO2 INJECTION | LIVESTOCK LEVEL | MAINTENANCE |
| Low | Little to none | Minimal | Less |
| Medium | Moderate | Moderate | Moderate |
| High | High | High | More |
In general, the table above illustrates what every hobbyist should consider. Of course, that’s not to say that those scenarios are absolute in this hobby. One can achieve a high light tank that has very little maintenance after it’s fully established. However, the table above merely illustrates a highly generalized guide of what to expect in such planted aquarium conditions.
In our case, we are venturing into the “High light/high CO2 injection/High livestock” category with this rescape. Thus we will perform the following maintenance schedule which has been predetermined by our choice in aquarium equipment, aquascape style, aquatic plant choice, livestock quantity, and overall lifestyle/personal preference:
| WEEK 1-2 | Daily 50% water changes |
| WEEK 3-4 | 50% water changes every other day (add algae clean up crew ie. Amano Shrimp, Siamese Algae Eater, Otocinclus Catfish, Nerite Snails, etc) |
| WEEK 4-5 | 50% water changes every two days (add liquid fertilizer such as Ultum Nature Systems All-In-One Plant Food) |
| MONTH 3 | 50% Water change once a week (add main livestock) |
This aquarium routine maintenance schedule may seem excessive; however, as mentioned before, is case by case and tailored to our aquarium setup. We’ve factored in the following to justify this water change schedule:
- Tropica Aquarium Soil is very nutrient-rich and since we’ve only planted a single foreground plant, there will be an excessive amount of nutrients that can lead to algae problems
- Water changes will remove all impurities such as excess Ammonia, Nitrates, and Nitrites from the aquarium that is detrimental to all aquatic life including aquarium plants (ie. Ammonia burn)
- To prevent algae growth in high light planted tank environment and promote aquatic plant growth
- Since this was a rescape scenario, water changes will also flush out all rotting detritus that was left over from the previous aquascape
After re-reading this comprehensive article on how to rescape or set up a planted aquarium, we understand that it may be a lot to take in. However, our intentions were to be as detailed as possible in order to help explain factors that should be considered and understood in this amazing hobby. Our goal was to simplify how to rescape or even set up a newly planted aquarium without all the technical jargon. The planted aquarium hobby to us is more of an art form rather than a science project that requires specific numbers dialed into the tee. The last time we tested our tank parameters was years ago. Nowadays, it’s based on aquatic plant and livestock health in combination with CO2 drop checkers that provides us with visual updates on our tanks’ overall wellbeing.


Drop us a comment below or send us a message on our social media platforms if you thought this article was helpful. Until next time!


I used eco complete substrate because it’s all that was local and I was impatient! What are your thoughts on fertilizer via EI method earlier?
EI method is great if you keep up with the maintenance. The EI method of dosing is really just about blasting the nutrients into the aquarium and whatever doesn’t get used is flushed out via large weekly water changes. We tend to dose the opposite and go lean on the fertilizers and only add more when the plants ask for it. That way there’s less maintenance involved and on top of that we end up saving some cash on fertilizers. Either method is good, just whatever the user is more comfortable with.